“`html
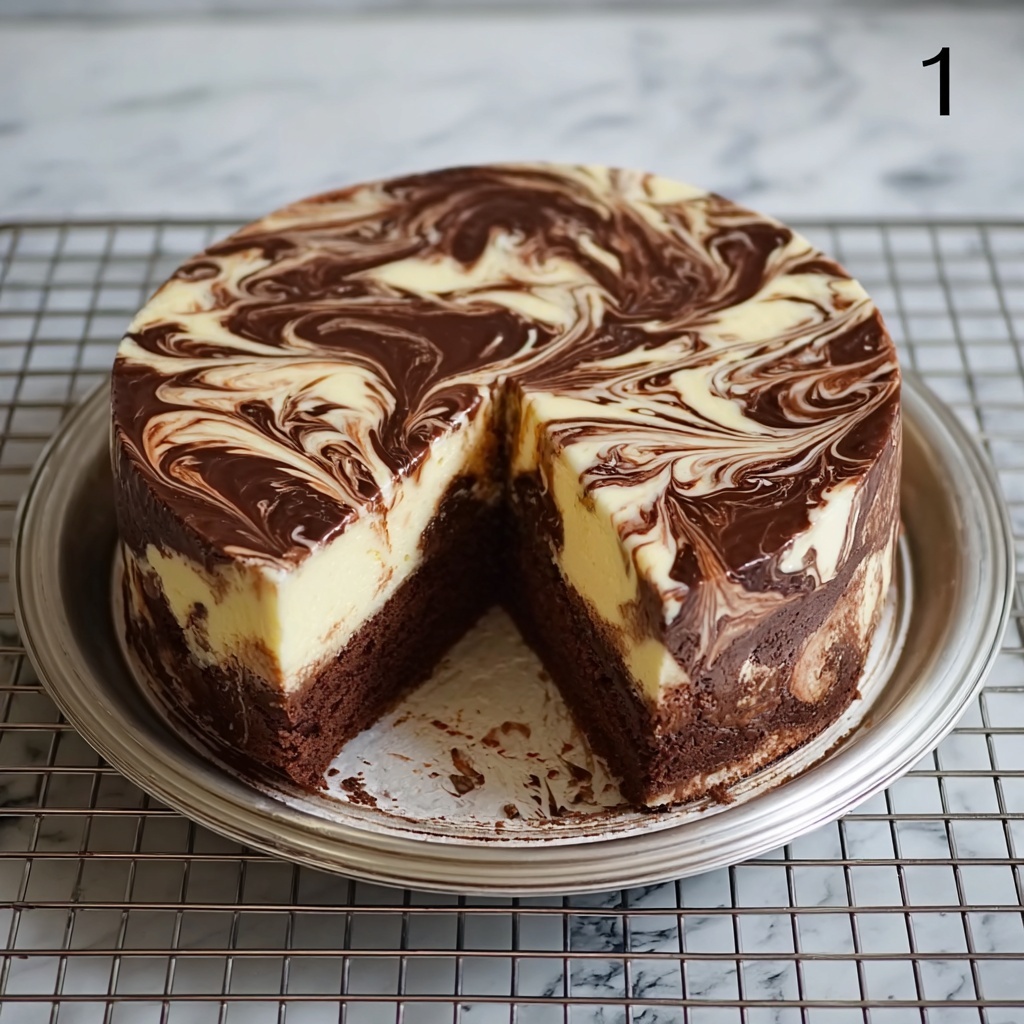
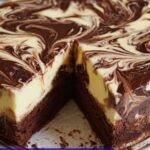
If you have a craving for something both nostalgic and utterly delightful, you’ve got to try this Classic Marble Cake Recipe. It’s the perfect balance of moist vanilla and rich chocolate swirled into one irresistible cake that’s as beautiful as it is delicious. Whether you’re baking for a special occasion or just because the day calls for something sweet, this cake brings an old-fashioned charm and unbeatable flavor that’ll have everyone asking for seconds.
Ingredients You’ll Need
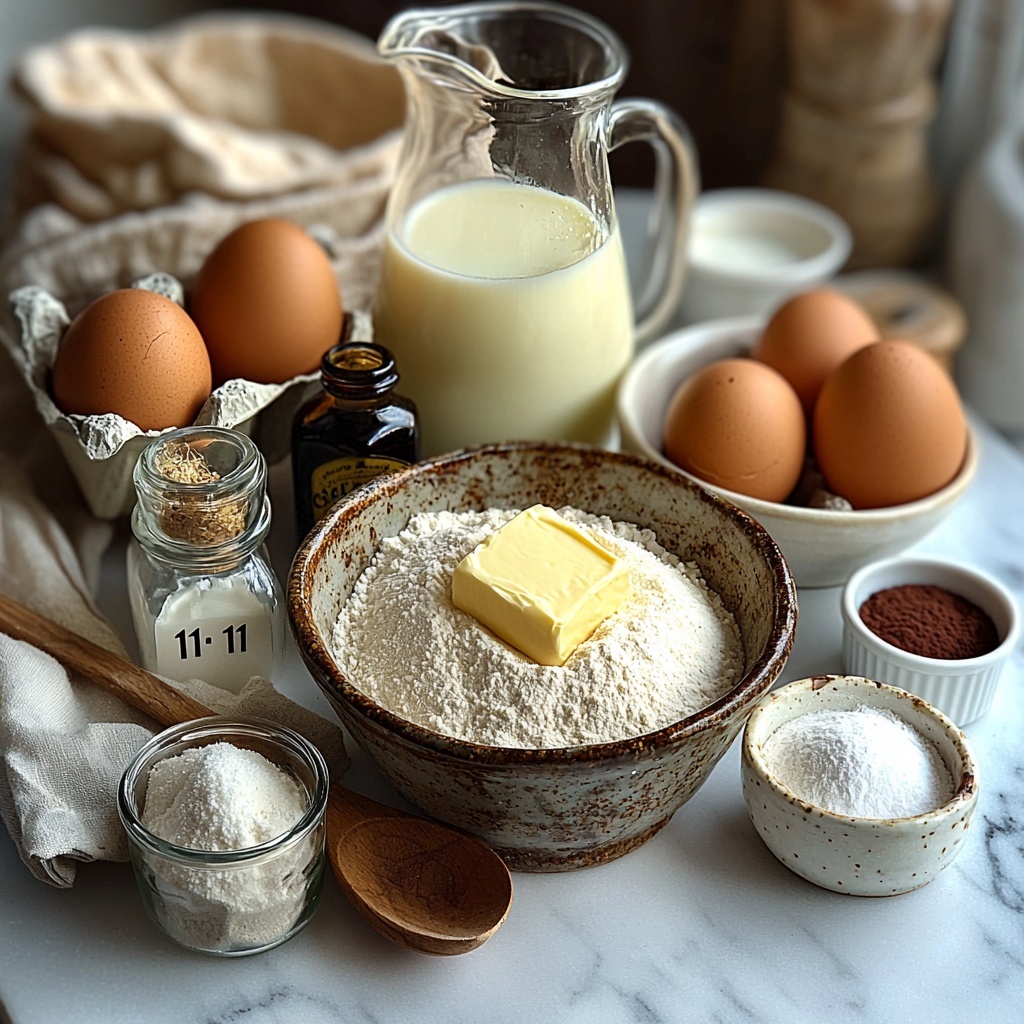
The beauty of this Classic Marble Cake Recipe lies in its simplicity. Each ingredient plays a crucial role in balancing flavor, texture, and that iconic marbled look you can’t resist. Here’s what you need to gather before the magic happens:
- 2 cups all-purpose flour: The foundation of the cake, providing structure and softness.
- 1 cup white sugar: Adds sweetness and helps create a tender crumb.
- 1 cup milk: Moisturizes the batter for a soft, fluffy cake.
- 2 large eggs: Bind the ingredients and enrich the cake’s texture.
- ½ cup butter, softened: Brings luscious richness and moisture.
- 2 teaspoons baking powder: Ensures your cake rises perfectly light.
- 1 teaspoon vanilla extract: Boosts the vanilla flavor for warmth and depth.
- ½ teaspoon salt: Enhances all the flavors by balancing the sweetness.
- 2 tablespoons unsweetened cocoa powder: Gives the chocolate swirl its distinct, bold taste.
How to Make Classic Marble Cake Recipe
Step 1: Prepare Your Pan and Oven
Start by preheating your oven to 350 degrees F (175 degrees C). Grease and flour a 9-inch round cake pan thoroughly to prevent any sticking and to ensure an easy release after baking. This sets the stage for your cake to bake evenly and come out looking flawless.
Step 2: Combine the Base Ingredients
In a large mixing bowl, add your flour, sugar, milk, eggs, softened butter, baking powder, vanilla extract, and salt. Begin mixing slowly to just moisten the ingredients, then switch to an electric mixer at medium speed and beat for about 2 minutes until the batter is smooth and creamy. This step is where the batter becomes perfectly homogeneous, promising a tender cake.
Step 3: Divide and Flavor
Carefully reserve ¾ cup of the batter for the chocolate portion. Pour the remaining vanilla batter into your prepared pan. To the reserved portion, add the unsweetened cocoa powder and mix well until the batter turns a rich chocolate color. This division lets you achieve that stunning swirl effect intrinsic to the recipe’s charm.
Step 4: Create the Marbled Effect
Drop large spoonfuls of the chocolate batter over the vanilla batter in the pan. Then, using a knife, gently swirl the two batters together to create a natural, marbled pattern—avoid overmixing since the beauty lies in the contrast. This step is as much about artistry as it is about flavor.
Step 5: Bake to Perfection
Pop the pan into your preheated oven and bake for 30 to 35 minutes. You’ll know it’s done when a toothpick inserted into the center comes out clean. The smell of vanilla and cocoa filling your kitchen will be a delicious promise of what’s to come.
Step 6: Cool and Unmold
Allow the cake to cool briefly on a wire rack, then carefully invert it onto a serving plate or cooling rack. Let it cool completely before slicing to ensure clean cuts and to let the flavors settle beautifully.
How to Serve Classic Marble Cake Recipe
Garnishes
A dusting of powdered sugar adds a touch of elegance without overpowering the cake’s flavor. For an extra indulgent treat, a drizzle of chocolate ganache or a dollop of whipped cream with a fresh raspberry on the side elevates this classic even more.
Side Dishes
This cake pairs wonderfully with a simple cup of coffee or a creamy latte if you want a comforting snack. For dessert, serve alongside fresh berries or a light scoop of vanilla ice cream to complement the marble cake’s rich texture.
Creative Ways to Present
Slice the cake into neat wedges and layer between thin sheets of parchment for an attractive picnic treat. Or, stack small pieces with alternating layers of whipped cream and fruit in clear glasses for a stunning marble cake parfait that’s perfect for guests.
Make Ahead and Storage
Storing Leftovers
You can store any leftover Classic Marble Cake Recipe in an airtight container at room temperature for 3-4 days. This keeps the cake moist and flavorful while preventing it from drying out. Be sure to keep it sealed to avoid any fridge odors meddling with its delicate taste.
Freezing
If you want to keep the cake longer, wrap it tightly in plastic wrap and then foil before freezing. It will stay fresh for up to 2 months. When you’re ready to enjoy it again, just thaw the cake overnight in the refrigerator for the best texture.
Reheating
While this cake is delicious at room temperature, you can gently warm slices in a microwave for about 10-15 seconds to bring back that freshly-baked feel. Just be careful not to overheat, or you might end up drying it out.
FAQs
Can I use a different type of flour for this Classic Marble Cake Recipe?
While all-purpose flour is ideal for the right texture and rise, you can experiment with half whole wheat or gluten-free flours, adjusting moisture as needed. Just keep in mind the texture might be slightly different but still tasty!
What’s the secret to getting the perfect marbled effect?
The key is to gently swirl the chocolate batter into the vanilla without overmixing. Use a knife to create large swoops and spirals instead of stirring vigorously. This way, you keep the distinct light and dark sections beautiful and defined.
Can I make this cake in a different pan shape or size?
Yes! You can use a loaf pan or square pan—just adjust the baking time accordingly. Keep an eye on it and test with a toothpick as baking times will vary based on thickness.
Is this Classic Marble Cake Recipe suitable for kids?
Absolutely! The flavors are mild and universally loved, making it a fantastic treat for kids and adults alike. Plus, the swirled pattern tends to delight little ones every time.
How do I know when the cake is done baking?
The traditional toothpick test works best: insert a toothpick into the center, and if it comes out clean or with just a few crumbs, your cake is perfectly baked. This ensures the cake is moist inside without being undercooked.
Final Thoughts
This Classic Marble Cake Recipe is more than just a dessert; it’s a little celebration baked into every bite. Whether you’re an experienced baker or just starting, the simple ingredients and straightforward steps result in a cake that’s sure to warm your heart and brighten your day. Treat yourself and your loved ones—once you try this, it’s bound to become a cherished favorite in your kitchen.
“`
Print
Classic Marble Cake Recipe
- Prep Time: 15 minutes
- Cook Time: 35 minutes
- Total Time: 50 minutes
- Yield: 1 9-inch round cake (approximately 8 servings)
- Category: Dessert
- Method: Baking
- Cuisine: American
Description
This Classic Marble Cake recipe combines moist vanilla and rich chocolate batters swirled together to create a beautiful marbled effect and a delightful, balanced flavor. Perfect for any occasion, this cake is easy to make with simple ingredients and bakes to a soft, tender crumb with a slightly crisp crust.
Ingredients
Dry Ingredients
- 2 cups all-purpose flour
- 1 cup white sugar
- 2 teaspoons baking powder
- ½ teaspoon salt
- 2 tablespoons unsweetened cocoa powder
Wet Ingredients
- 1 cup milk
- 2 large eggs
- ½ cup butter, softened
- 1 teaspoon vanilla extract
Instructions
- Preheat and prepare pan: Preheat your oven to 350°F (175°C). Grease and flour a 9-inch round cake pan to prevent sticking.
- Combine ingredients: In a large bowl, add the flour, sugar, milk, eggs, softened butter, baking powder, vanilla extract, and salt.
- Mix batter: Mix the ingredients slowly at first to moisten everything evenly, then beat with an electric mixer at medium speed for about 2 minutes until you achieve a smooth, lump-free batter.
- Divide batter: Reserve ¾ cup of the batter and pour the remaining majority of the vanilla batter into the prepared cake pan.
- Add cocoa powder: Stir the unsweetened cocoa powder into the reserved ¾ cup batter until it is evenly colored and smooth.
- Create marbled effect: Drop large spoonfuls of the chocolate batter on top of the vanilla batter in the pan. Using a knife, gently swirl the chocolate batter through the vanilla batter to create a marbled pattern. Be careful not to overmix.
- Bake the cake: Place the pan in the preheated oven, and bake for 30 to 35 minutes. Test doneness by inserting a toothpick in the center; it should come out clean.
- Cool the cake: Remove the cake from the oven and cool briefly on a wire rack. Once cool enough, invert the cake onto a serving plate or wire rack and allow it to cool completely before slicing and serving.
Notes
- Ensure butter is softened at room temperature for easy mixing.
- Do not over-swirl the batter to maintain a clear marbled design.
- Check the cake around 30 minutes to avoid overbaking, as ovens vary.
- Use a toothpick or cake tester to confirm the cake is fully baked.
- This cake can be served plain or with dusted powdered sugar or frosting as desired.
