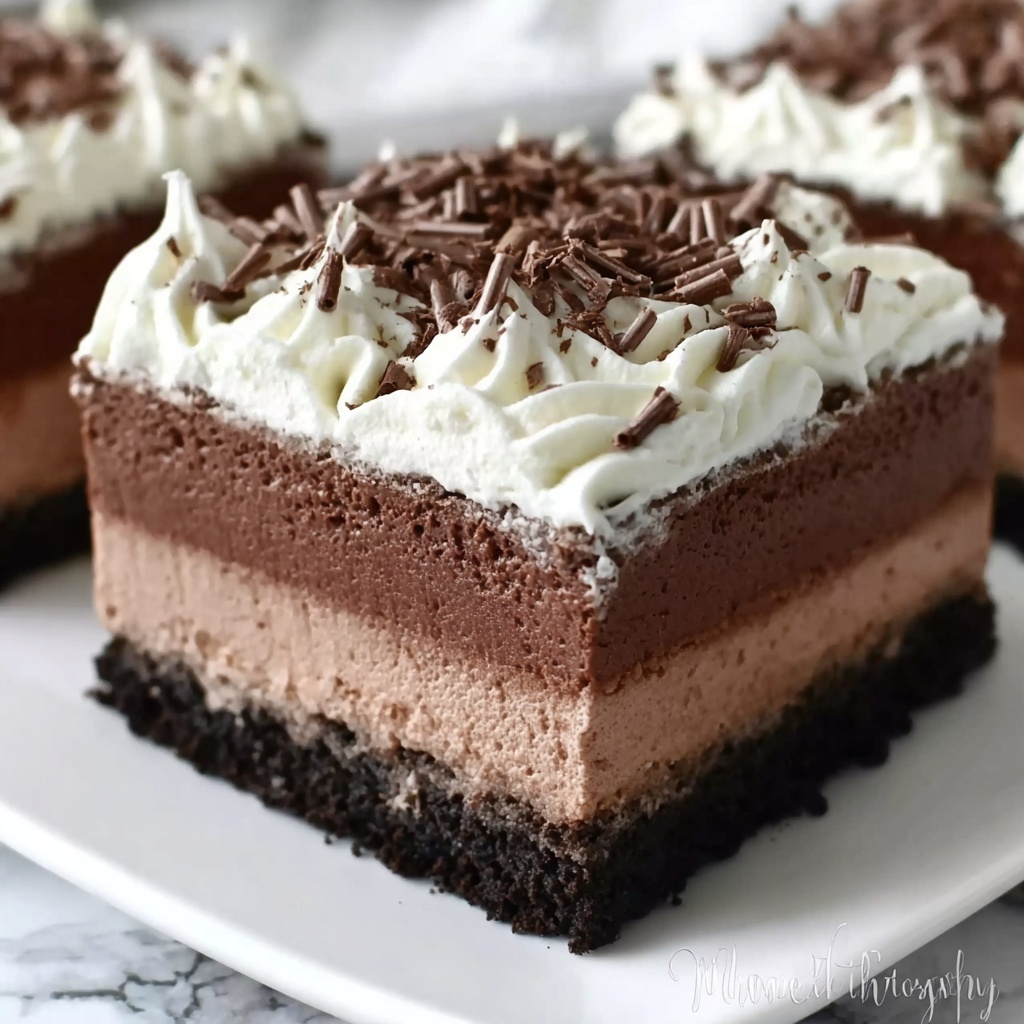
If you are a chocolate lover who adores rich, creamy, and decadent desserts without the hassle of an oven, then this No-Bake Chocolate Mousse Bars Recipe is an absolute game-changer. Imagine layers of luscious chocolate mousse atop a crisp chocolate cookie crust, finished with a silky chocolate ganache, all coming together into elegant bars that require minimal effort but deliver maximum indulgence. It’s perfect for impressing guests or treating yourself when a sweet craving hits. The texture is heavenly and each bite melts in your mouth, making it impossible to stop at just one.
Ingredients You’ll Need
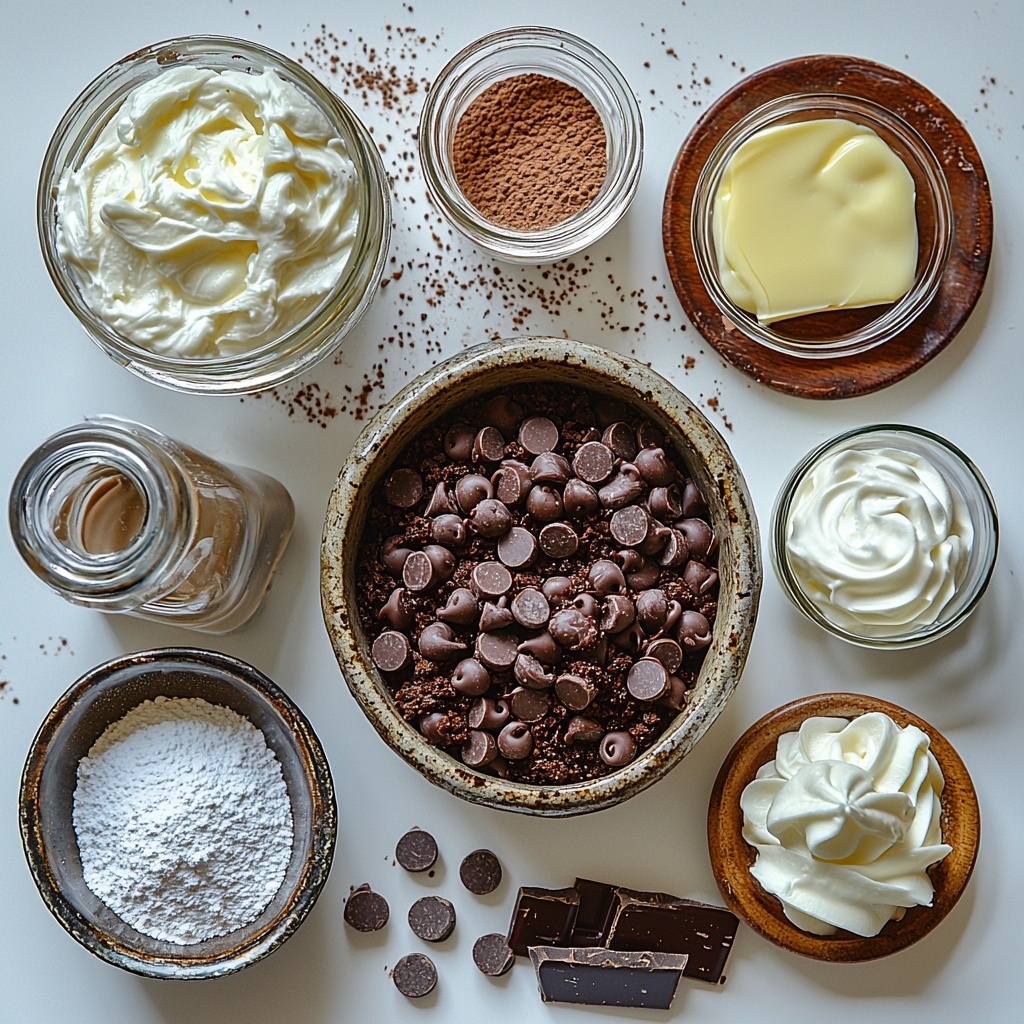
This No-Bake Chocolate Mousse Bars Recipe relies on simple, quality ingredients that work in harmony to create layers of flavor and texture. Each component plays a vital role—from the crumbly cookie crust anchoring the bars to the airy mousse and smooth chocolate topping that make every bite special.
- 2 cups chocolate cookie crumbs: The crunchy, chocolatey base that gives structure and a delightful texture contrast.
- ½ cup melted butter: Helps bind the cookie crumbs into a firm crust while adding richness.
- 1 ½ cups heavy cream: Whipped to fluffy perfection, this forms the light and creamy mousse layer.
- 1 cup semisweet chocolate chips, melted: Provides the deep chocolate flavor in the mousse layer.
- ¼ cup powdered sugar: Adds just the right amount of sweetness to balance the rich chocolate and cream.
- 1 teaspoon vanilla extract: Enhances the overall flavor with a warm, aromatic note.
- ¾ cup semisweet chocolate chips: Used in the chocolate ganache layer for a glossy, smooth finish.
- ½ cup heavy cream: Heated to melt the chocolate chips and create the luscious ganache topping.
- ½ cup whipped cream: Optional topping that adds an airy, creamy accent before serving.
- Chocolate shavings or cocoa powder (optional): Perfect finishing touches for an extra touch of elegance.
How to Make No-Bake Chocolate Mousse Bars Recipe
Step 1: Prepare the Crust
Start by combining the chocolate cookie crumbs and melted butter in a bowl. This mixture forms the foundation, so make sure the crumbs are evenly coated with butter for a firm, compact crust. Press this mixture firmly into the bottom of an 8×8-inch dish, creating an even layer. Once done, pop it into the refrigerator to chill while you move on to the mousse. This chilling step is key to ensuring a sturdy base that won’t crumble when you slice into the bars.
Step 2: Make the Mousse Filling
In a separate bowl, beat together the heavy cream, melted semisweet chocolate chips, powdered sugar, and vanilla extract until fluffy and light. This mousse layer is where the magic happens, as the airy whipped cream combines with rich chocolate to create an irresistibly smooth and creamy texture. Spread this mousse evenly over the chilled cookie crust, using a spatula to smooth the top. Return the dish to the refrigerator to set while you prepare the next decadent layer.
Step 3: Add the Chocolate Ganache Layer
Warm the remaining ½ cup of heavy cream until it’s hot but not boiling—this step is crucial to melt the chocolate properly without burning it. Pour the warm cream over the ¾ cup of semisweet chocolate chips and let it sit for a minute to soften. Then stir gently until the mixture is completely smooth and glossy. This ganache will create a shiny, rich top layer that complements the mousse beautifully. Spread it evenly over the mousse and chill the entire dessert for at least 4 hours, allowing all layers to set perfectly.
Step 4: Garnish and Slice
Just before serving, add a dollop of whipped cream on top of each bar and sprinkle with chocolate shavings or a dusting of cocoa powder if you like. These finishing touches not only enhance the flavor but also elevate the presentation, turning simple bars into a show-stopping dessert. Slice into 12 bars and get ready to enjoy every chocolaty bite!
How to Serve No-Bake Chocolate Mousse Bars Recipe
Garnishes
For the final flourish, whipped cream adds a light, creamy contrast against the dense mousse, while chocolate shavings or cocoa powder give a beautiful, aromatic finish. Fresh berries like raspberries can also add a pop of color and a hint of tartness that balances the sweetness perfectly.
Side Dishes
Pair these bars with a scoop of vanilla ice cream or a drizzle of fresh raspberry sauce. A warm cup of coffee or espresso is an ideal companion, as the bitterness cuts through the rich chocolate and enhances the overall tasting experience.
Creative Ways to Present
Try serving the mousse bars in clear glass dishes as layered parfaits for a stunning effect. Alternatively, consider freezing the bars briefly, then slicing and serving with a sprinkle of sea salt or crushed nuts for added texture and flavor complexity.
Make Ahead and Storage
Storing Leftovers
These bars keep beautifully in an airtight container in the refrigerator for 3 to 4 days. This makes them a perfect make-ahead treat for gatherings or as a delightful post-dinner dessert that you can enjoy over several days without losing any of the luscious texture and flavor.
Freezing
You can freeze the bars wrapped tightly in plastic wrap and foil or stored in an airtight container for up to 1 month. When you’re ready to eat, thaw them overnight in the refrigerator to maintain the perfect mousse consistency without any soggy crust issues.
Reheating
Because these bars are best served chilled, reheating is not recommended. Instead, allow any frozen bars to thaw fully in the fridge before serving, ensuring the mousse and ganache layers retain their ideal silky texture.
FAQs
Can I use different cookies for the crust?
Absolutely! While chocolate cookie crumbs add richness, you can experiment with graham crackers or even biscotti crumbs to give the crust a unique flavor and crunch. Just keep the buttery binder the same to maintain firmness.
Is this recipe suitable for beginners?
Yes! This No-Bake Chocolate Mousse Bars Recipe is straightforward and requires no complicated techniques or baking skills. The layering and chilling do most of the work for you.
Can I substitute the heavy cream with something else?
Heavy cream is essential for whipping and creating the mousse texture. While some plant-based creams can work, they might not whip up the same way, so the texture could be different. For best results, stick to heavy cream.
How do I know when the mousse is properly whipped?
The mousse should be light, airy, and hold soft peaks without being overbeaten into butter. It should look fluffy and spreadable for easy layering over the crust.
Can this dessert be made gluten-free?
Yes! Use gluten-free chocolate cookies or crumbs for the crust, and double-check that all your chocolate chips are gluten-free. This tweak keeps the dessert safe for gluten-sensitive friends and family.
Final Thoughts
There’s something truly special about sharing a dessert that feels as luxurious as this No-Bake Chocolate Mousse Bars Recipe, yet comes together so effortlessly. Whether you’re easing into an elegant dinner party or sneaking a treat for yourself, these bars deliver creamy, chocolatey joy with every bite. Give this recipe a try and prepare to wow your taste buds and everyone lucky enough to share them with you!
Print
No-Bake Chocolate Mousse Bars Recipe
- Prep Time: 15 minutes
- Cook Time: 0 minutes
- Total Time: 4 hours 15 minutes
- Yield: 12 servings
- Category: Dessert
- Method: No-Cook
- Cuisine: American
Description
No-Bake Chocolate Mousse Bars are a decadent and creamy dessert featuring a chocolate cookie crumb crust, a fluffy chocolate mousse middle layer, and a smooth chocolate ganache topping. Perfectly chilled and easy to prepare without an oven, these bars are a crowd-pleaser for any occasion.
Ingredients
Crust
- 2 cups chocolate cookie crumbs
- ½ cup melted butter
Mousse Filling
- 1 ½ cups heavy cream
- 1 cup semisweet chocolate chips, melted
- ¼ cup powdered sugar
- 1 teaspoon vanilla extract
Chocolate Layer
- ¾ cup semisweet chocolate chips
- ½ cup heavy cream
Garnish
- ½ cup whipped cream
- Chocolate shavings or cocoa powder (optional)
Instructions
- Prepare the Crust: In a bowl, combine the chocolate cookie crumbs and melted butter thoroughly. Press this mixture firmly into the bottom of an 8×8-inch dish to form an even crust layer. Place the crust in the refrigerator to chill while preparing the mousse filling.
- Make the Mousse: In a mixing bowl, beat the heavy cream, melted semisweet chocolate, powdered sugar, and vanilla extract together until the mixture is light, fluffy, and well combined. Spread the mousse evenly over the chilled crust layer. Return to the refrigerator while preparing the chocolate layer.
- Add the Chocolate Layer: Gently heat the heavy cream until warm but not boiling. Pour the warm cream over the semisweet chocolate chips and let it sit for a minute to soften the chocolate. Stir gently until the mixture is smooth and glossy. Spread this chocolate ganache evenly over the mousse layer.
- Chill: Place the bars in the refrigerator and let them chill for at least 4 hours, or until the mousse and chocolate layers are fully set.
- Garnish & Serve: Before serving, top the bars with whipped cream and optionally sprinkle with chocolate shavings or cocoa powder. Slice into bars and enjoy this rich, creamy dessert.
Notes
- Ensure the heavy cream is cold before whipping for best volume.
- Use quality semisweet chocolate for richer flavor.
- For a stronger chocolate flavor, you can add a tablespoon of espresso powder to the mousse.
- Store bars covered in the refrigerator for up to 3 days.
- Allow the bars to sit at room temperature for 5-10 minutes before serving for easier slicing.


