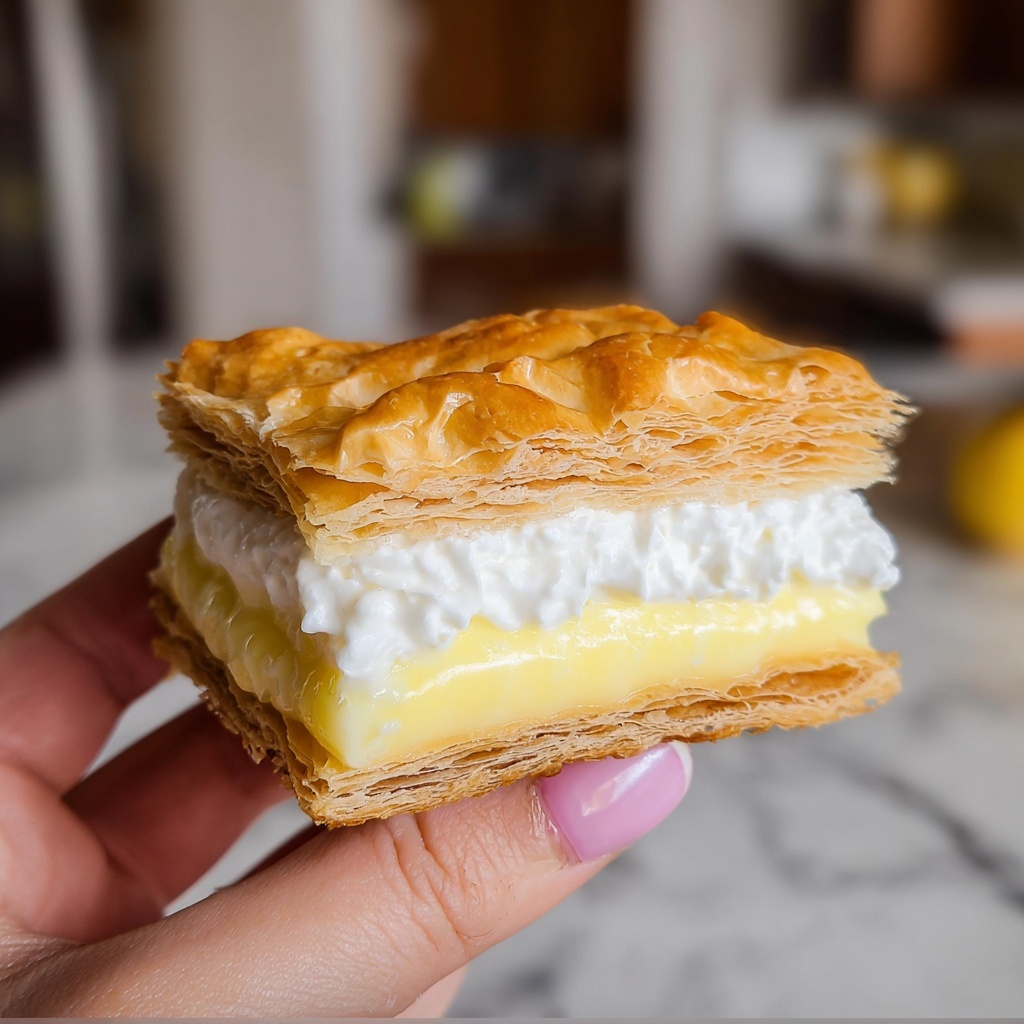
If you have a sweet tooth and a love for light, airy desserts, then you’re going to adore this Almond Dacquoise Cream Clouds Recipe. Imagine delicate layers of nutty almond meringue that are crisp on the outside yet tender within, sandwiched with silky, vanilla-kissed whipped cream. It’s a stunning dessert that feels both elegant and comforting, capturing just the right balance between crunchy and creamy. Whether it’s a special occasion or just a treat to brighten your day, this Almond Dacquoise Cream Clouds Recipe will quickly become a favorite in your baking repertoire.
Ingredients You’ll Need
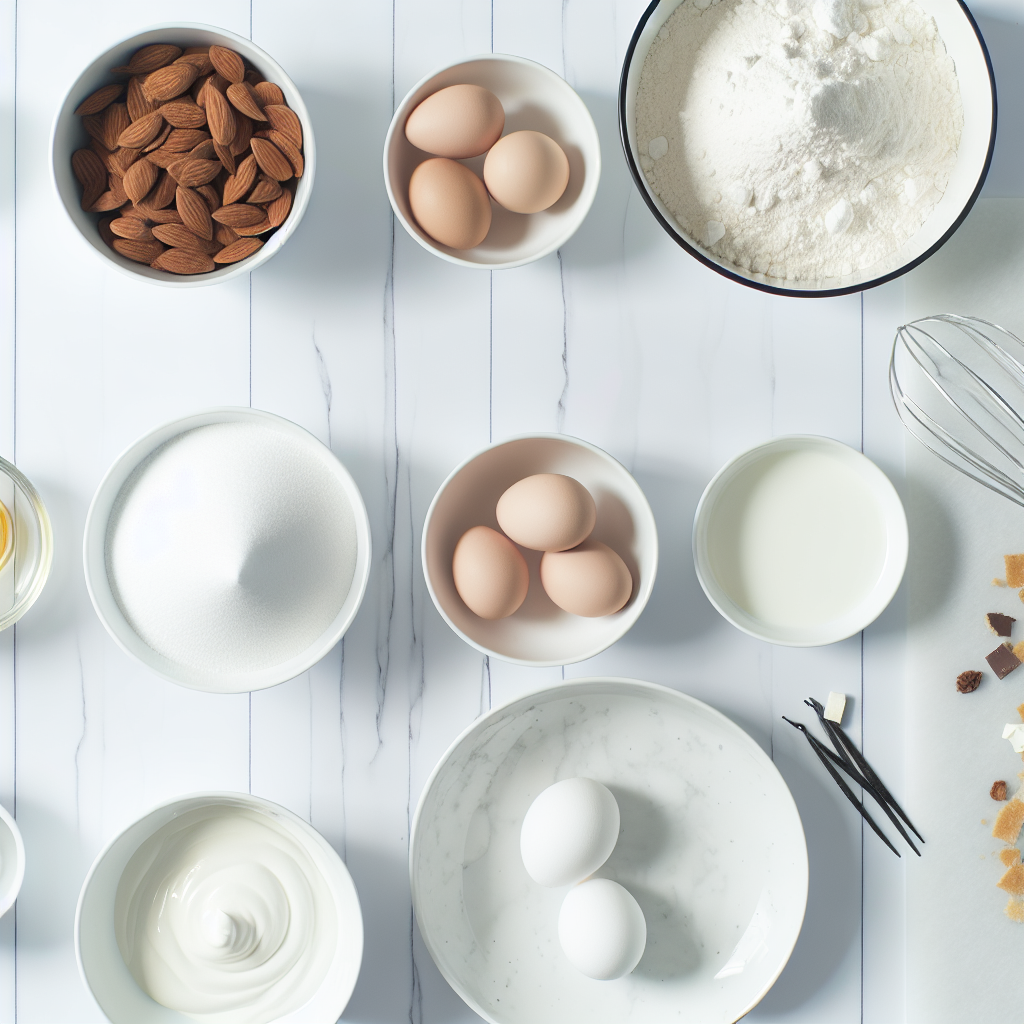
These simple yet essential ingredients come together to create the trademark texture and flavor of the Almond Dacquoise Cream Clouds Recipe. Each item plays a crucial role — from the nutty almond flour giving depth to the meringue to the rich heavy cream providing lusciousness to the filling.
- 150g almond flour: Adds a natural, nutty flavor and delicate structure to the meringue layers.
- 150g powdered sugar: Mixes with almond flour to sweeten and stabilize the meringue base.
- 5 egg whites: Whisked into fluffy peaks, they create the light and airy texture Dacquoise is known for.
- 150g granulated sugar: Gradually incorporated to build glossy, stiff peaks for perfect meringue.
- 300ml heavy cream: Whipped to a smooth, creamy filling that balances the crunchy meringue.
- 50g icing sugar: Sweetens the cream and helps it hold its shape.
- 1 tsp vanilla extract: Infuses the whipped cream with warm, inviting aroma and flavor.
How to Make Almond Dacquoise Cream Clouds Recipe
Step 1: Prepare Your Oven and Dry Ingredients
Start by preheating the oven to 160°C (320°F). While it warms up, mix the almond flour and powdered sugar in a bowl. This mixture gives your Dacquoise its signature almond flavor and a tender crumb. Having the oven ready ensures your meringue bakes evenly and perfectly.
Step 2: Whip Egg Whites to Soft Peaks
In a clean, dry bowl, beat the egg whites until soft peaks form. This is the foundation of our airy meringue, so patience and the right bowl are key here. Soft peaks mean when you lift the whisk, the peaks gently droop at the tips—just the right texture before adding sugar.
Step 3: Sweeten and Stiffen the Meringue
Gradually add granulated sugar to the egg whites while continuing to whip. This step transforms the meringue into glossy stiff peaks that hold their shape, which is essential for the crisp yet tender structure of the Dacquoise layers.
Step 4: Fold in Almond Mixture Gently
Carefully fold the almond flour and powdered sugar mixture into the whipped egg whites. Use a gentle motion to keep as much air in the batter as possible — this ensures that your Dacquoise layers bake light and fluffy, not dense or collapsed.
Step 5: Pipe and Bake the Layers
Transfer the batter to a piping bag and pipe your mixture onto a baking sheet lined with parchment paper. You can create circles, rectangles, or any shape you prefer. Bake for 25-30 minutes until the outer edges are golden and the layers feel firm to the touch. This creates the crunchy exterior that contrasts beautifully with the creamy filling.
Step 6: Cool and Prepare the Whipped Cream Filling
Once the meringue layers have cooled completely, whip the heavy cream with the icing sugar and vanilla extract. The cream should be luscious and soft but stable enough to hold its shape between the meringue layers, creating that dreamy cloud-like texture you expect from this dessert.
Step 7: Assemble Your Almond Dacquoise Cream Clouds Recipe
Finally, sandwich the whipped cream between two meringue layers. Press gently so the cream peeks out slightly at the edges, creating a beautiful and indulgent presentation. Now your Almond Dacquoise Cream Clouds Recipe is ready to dazzle!
How to Serve Almond Dacquoise Cream Clouds Recipe
Garnishes
To elevate your Almond Dacquoise Cream Clouds Recipe, consider adding a few elegant garnishes. Fresh berries, a dusting of cocoa powder, or toasted almond flakes add vibrant color, texture, and flavor contrast. These touches turn this homemade dessert into something that looks as beautiful as it tastes.
Side Dishes
This dessert shines on its own but pairs wonderfully with light accompaniments. A scoop of fruit sorbet or a simple fruit salad with citrus notes can balance the richness of the cream and the sweetness of the meringue, creating a well-rounded finish to any meal.
Creative Ways to Present
Try layering individual Almond Dacquoise Cream Clouds in glass parfait cups for a charming presentation or cut them into mini portions for bite-sized delights perfect for afternoon tea. You can even add a drizzle of chocolate sauce for an extra indulgent twist.
Make Ahead and Storage
Storing Leftovers
If you have leftovers of your Almond Dacquoise Cream Clouds Recipe, store them covered in the refrigerator for up to 2 days. The meringue may soften slightly as it absorbs moisture from the cream, but the flavors will remain delicious and fresh.
Freezing
While you can freeze the meringue layers separately for up to a month, it’s best to assemble the dessert fresh to enjoy the perfect texture. Freezing the assembled dessert is not recommended as the whipped cream’s texture may degrade upon thawing.
Reheating
This dessert is best served chilled, so reheating is not advised. To revive crispness, gently warm the meringue layers alone in the oven before assembling, but always let them cool before adding the whipped cream.
FAQs
What makes a Dacquoise different from other meringues?
Dacquoise is unique because it incorporates nut flour—usually almonds or hazelnuts—into the meringue, giving it added flavor, a slightly chewy texture inside, and a delightful nutty aroma.
Can I use different nuts instead of almond flour?
Absolutely! Hazelnut or pistachio flour can be used as alternatives, though this will subtly change the flavor profile and texture of your Almond Dacquoise Cream Clouds Recipe.
How do I know when the meringue is perfectly baked?
The edges should be lightly golden, and the meringue should feel dry and crisp to the touch. It should easily peel from the parchment paper without sticking or breaking.
Can I make the whipped cream dairy-free?
Yes, try using a coconut cream or another plant-based cream alternative, but be aware that the texture and flavor will differ slightly from traditional heavy cream.
What’s the best way to pipe the meringue mixture?
Use a large round tip or cut the piping bag’s tip to pipe circles or your chosen shapes evenly. Practice on parchment paper first to get a consistent size and shape for even baking.
Final Thoughts
Making the Almond Dacquoise Cream Clouds Recipe is a wonderful way to impress your friends and treat yourself to something truly special. The combination of airy almond meringue and rich, vanilla whipped cream makes every bite feel like a little celebration. Give it a try—you’ll love how this elegant dessert comes together with just a handful of simple ingredients and a bit of care!
Print
Almond Dacquoise Cream Clouds Recipe
- Prep Time: 30 minutes
- Cook Time: 30 minutes
- Total Time: 1 hour
- Yield: 8 servings
- Category: Dessert
- Method: Baking
- Cuisine: French
- Diet: Vegetarian
Description
Almond Dacquoise Cream Clouds are delicate, light meringue-based layers made with almond flour and sugar, sandwiched with a luscious whipped cream filling flavored with vanilla. This elegant French dessert offers a perfect balance of crunchy and creamy textures, ideal for impressing guests or enjoying a sophisticated treat.
Ingredients
Dacquoise Layers
- 150g almond flour
- 150g powdered sugar
- 5 egg whites
- 150g granulated sugar
Cream Filling
- 300ml heavy cream
- 50g icing sugar
- 1 tsp vanilla extract
Instructions
- Preheat the oven. Set your oven to 160°C (320°F) to prepare it for baking the dacquoise layers evenly.
- Combine dry ingredients. In a bowl, mix together the almond flour and powdered sugar until well combined for a smooth batter base.
- Beat egg whites. In a separate clean bowl, whisk the egg whites until they form soft peaks, which means the peaks slightly droop when you lift the whisk.
- Add granulated sugar gradually. Continue beating the egg whites while slowly adding the granulated sugar until stiff peaks form and the mixture is glossy and firm.
- Fold in the almond mixture. Gently fold the almond flour and powdered sugar mixture into the beaten egg whites, taking care not to deflate the meringue.
- Pipe the batter. Using a piping bag or spoon, form the mixture into your desired shapes on a baking sheet lined with parchment paper.
- Bake the layers. Place the tray in the oven and bake for 25-30 minutes, or until the dacquoise layers turn golden and crisp on the outside.
- Cool completely. Remove the baked layers from the oven and allow them to cool entirely to room temperature to maintain their texture.
- Whip the cream. In a chilled bowl, whip the heavy cream together with icing sugar and vanilla extract until soft peaks form, creating a stable and airy filling.
- Assemble the dacquoise. Sandwich the cooled meringue layers with the whipped cream filling, pressing gently to create a beautiful layered dessert.
Notes
- Make sure the mixing bowl and whisk used for beating egg whites are completely clean and free of any fat to achieve stiff peaks.
- Gently folding the almond mixture into the egg whites is crucial to keep the meringue light and airy.
- Chilling the whipped cream bowl beforehand helps achieve better volume and stability.
- Serve the dacquoise shortly after assembling to enjoy the contrast of textures, or refrigerate briefly to keep it fresh.
- For extra flavor, consider adding a hint of almond extract or citrus zest to the cream filling.


