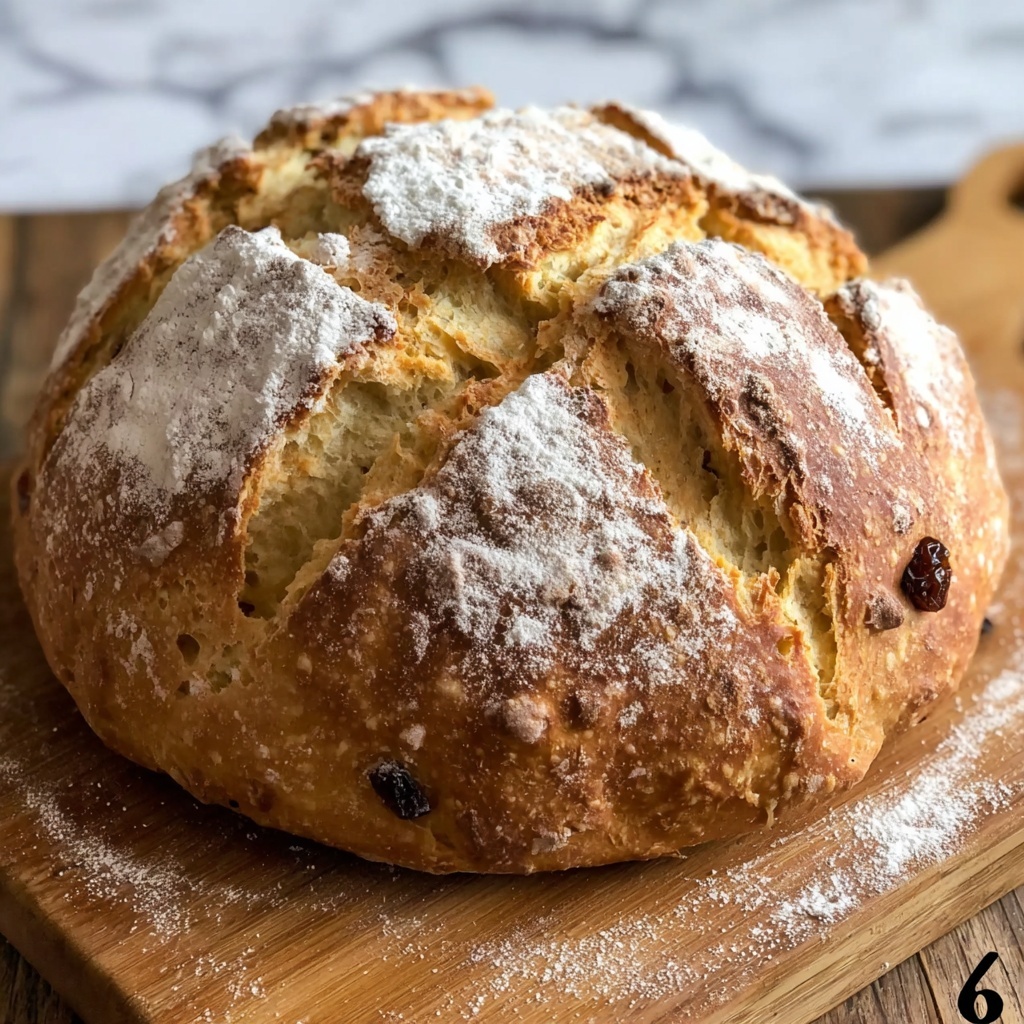
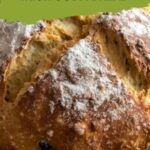
If you’re craving something warm, comforting, and full of heritage, this Irish Soda Bread Recipe Nostalgic Ultimate Classic Recipe is exactly what you need. This rustic loaf brings together simple ingredients that burst with flavor and history, creating a bread that’s tender inside with a crust that’s satisfyingly crisp. Baking this bread is like inviting a little slice of Irish tradition into your kitchen, perfect for sharing with loved ones or enjoying any time of day.
Ingredients You’ll Need
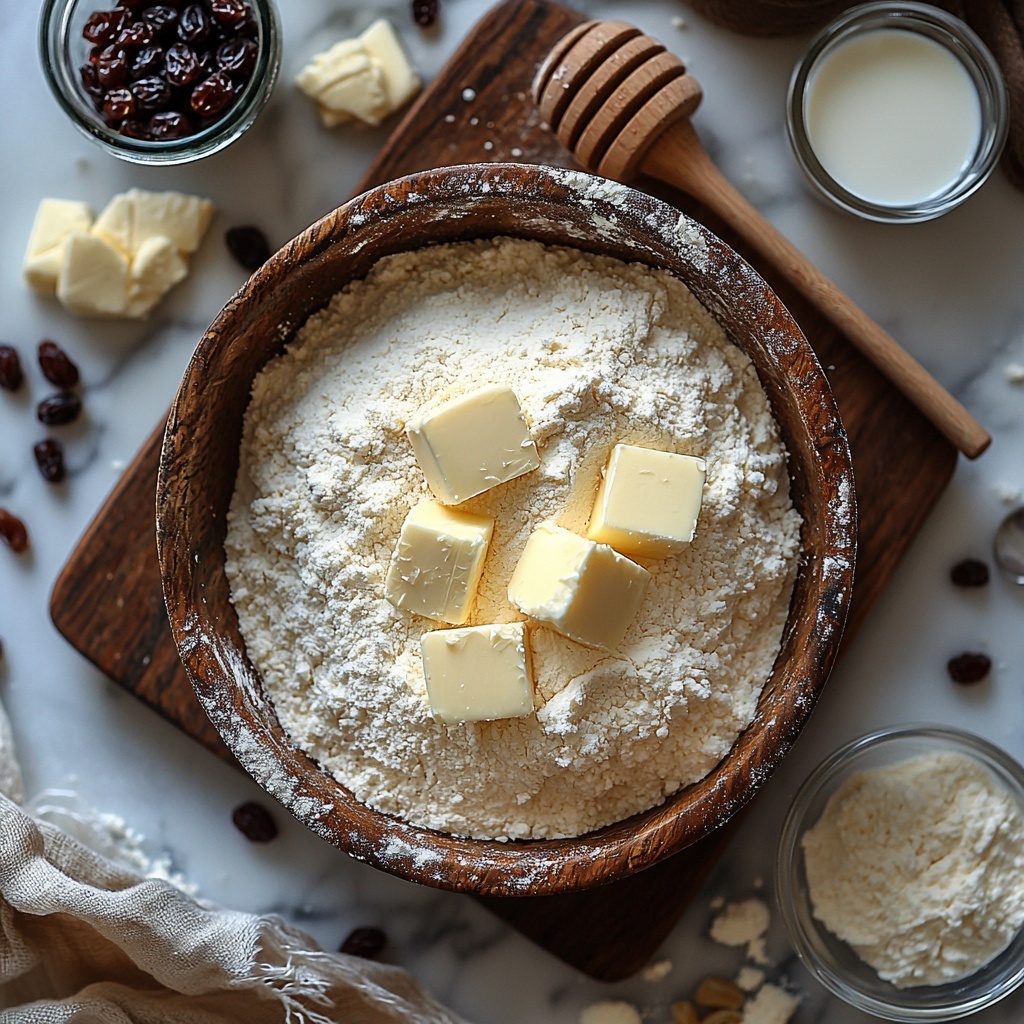
The beauty of this Irish soda bread lies in its simplicity, relying on a handful of staple ingredients that come together effortlessly. Each one plays a critical role, whether it’s the tangy buttermilk activating the baking soda, the flour creating the hearty base, or the optional add-ins offering bursts of sweetness or texture. Together, these familiar items create a loaf that feels both timeless and satisfying.
- 4 cups (500 g) all-purpose flour: The foundation of the bread’s tender yet rustic crumb; measure lightly for best results.
- 1 tsp baking soda: Fresh baking soda ensures the bread rises beautifully and develops that classic crumb.
- 1 tsp fine salt: Enhances flavor and balances the bread perfectly.
- 1 ¾ cups (420 ml) cold buttermilk: Provides tang and activates the leavening; add a little extra if dough feels dry.
- 2 tbsp (28 g) cold unsalted butter: Adds richness and a delicate crumb when rubbed into the flour.
- 1–2 tbsp sugar or honey: Just enough to bring a subtle sweetness, keeping the bread from feeling too plain.
- ¾ cup (110–120 g) raisins or currants (optional): For that bakery-style sweetness and delightful texture in every bite.
- 1 tbsp caraway seeds (optional): Traditional in many Irish soda breads, lending a warm, slightly anise-like flavor.
How to Make Irish Soda Bread Recipe Nostalgic Ultimate Classic Recipe
Step 1: Prep Your Oven and Work Surface
Start by preheating your oven to 425°F (220°C). Line a baking sheet with parchment paper or place a cast-iron skillet inside the oven to heat — either method works wonderfully for developing a golden, rustic crust. Lightly flour your clean work surface because you’ll want to shape your dough without sticking. A hot skillet can give your bread a beautifully crisp bottom crust faster, but a baking sheet is perfectly reliable if that’s more convenient.
Step 2: Mix the Dry Ingredients
In a large bowl, whisk together the flour, baking soda, and salt. If you’re using butter, rub it into the flour with your fingertips until the mixture resembles coarse crumbs. This step is important as it distributes the baking soda evenly and adds a lovely tender crumb to the finished bread.
Step 3: Add the Buttermilk and Form the Dough
Make a well in the center of the dry mixture and pour in most of the cold buttermilk (start with 1¾ cups). Stir gently with a fork or wooden spoon until the mixture just holds together and looks shaggy—you want to keep mixing to a minimum to avoid a tough texture. If the dough seems dry, add buttermilk 1 tablespoon at a time just until it forms a moist, soft dough that’s slightly tacky but not sticky.
Step 4: Shape and Fold in Optional Add-ins
Turn your dough onto the floured surface and gently bring it together. Pat it into a round about 6–7 inches (15–18 cm) wide and 1½–2 inches (4–5 cm) thick. If you’re adding raisins, currants, or caraway seeds, fold them in now with just a couple of gentle turns—no heavy kneading, as you want to keep the texture tender and light.
Step 5: Score the Top
Place the dough round onto your prepared pan or hot skillet. Using a sharp knife, score a deep cross about ½ inch (1 cm) deep across the top. This traditional step helps the bread expand evenly as it bakes and gives it that unmistakable Irish soda bread look.
Step 6: Bake the Bread
Bake at 425°F (220°C) for 25 minutes. Then reduce the oven temperature to 400°F (200°C) and bake for another 10–15 minutes until the crust is deeply golden and firm. Tap the bottom of the loaf; it should sound hollow when done, signaling that it’s perfectly baked through.
Step 7: Cool Before Slicing
Transfer the bread to a wire rack and allow it to cool for at least 20–30 minutes before cutting. This cooling step is crucial — slicing too early can result in a gummy crumb. Waiting gives you a cleaner slice and a better overall texture, just what you want from a classic loaf crafted using the Irish Soda Bread Recipe Nostalgic Ultimate Classic Recipe.
How to Serve Irish Soda Bread Recipe Nostalgic Ultimate Classic Recipe
Garnishes
Serving your soda bread warm with a pat of butter is simply divine, but you can elevate it by adding a smear of homemade jam, a drizzle of honey, or even a sprinkle of flaky sea salt. These little touches highlight every bite and make your simple loaf feel extra special.
Side Dishes
This bread pairs beautifully with hearty soups like Irish stew or creamy chowders. It’s also wonderful alongside breakfast dishes, providing a robust base for eggs and bacon or smoked salmon and cream cheese. Its tender yet dense texture makes it a versatile companion to almost any meal.
Creative Ways to Present
Try serving your Irish soda bread sliced thick with a selection of cheeses and cured meats for a rustic platter that dazzles guests. Or toast slices lightly and use them for open-faced sandwiches, layered with fresh herbs, avocado, or roasted veggies. Every way you serve it becomes a celebration of this timeless recipe.
Make Ahead and Storage
Storing Leftovers
Wrap any leftover bread tightly in plastic wrap or place in an airtight container to keep it fresh for up to two days at room temperature. The crust may soften slightly, but the inside will remain tender and delicious—perfect for quick breakfasts or snacks.
Freezing
If you want to enjoy this Irish Soda Bread Recipe Nostalgic Ultimate Classic Recipe any time, freeze the loaf once fully cooled. Slice it first for convenience, wrap each slice or the whole loaf tightly in plastic wrap, then place it in a freezer bag. Frozen soda bread can keep up to three months without losing flavor or texture.
Reheating
To revive frozen or stored bread, gently toast slices in a toaster or warm them briefly in the oven at low heat. This restores the crust’s crunch and warms the bread to that just-baked feeling that makes every bite so comforting.
FAQs
What makes this Irish Soda Bread special?
This Irish Soda Bread Recipe Nostalgic Ultimate Classic Recipe captures traditional flavors with a quick and easy method, highlighting the role of buttermilk and baking soda that create a tender crumb and distinctive tang. Its rustic look and flavor connect you with Irish heritage in a truly delicious way.
Can I use regular milk instead of buttermilk?
Buttermilk is essential because its acidity activates the baking soda for proper rise and adds flavor. You can substitute homemade buttermilk by adding 1 tablespoon of lemon juice or vinegar to 1 ¾ cups of milk and letting it sit for 5 minutes, but avoid plain milk alone for best results.
Why is it important to score the bread?
Scoring the loaf with a deep cross allows the bread to expand evenly as it bakes, preventing cracks and giving it that signature appearance. It also helps heat penetrate the center, ensuring a thorough bake.
How can I keep the bread from getting dense?
Light handling of the dough and properly measuring your flour are key. Avoid packing the flour into your measuring cup and refrain from overmixing or kneading the dough, as these create gluten that can make the bread tough instead of tender.
What variations can I try with this recipe?
You can add raisins, currants, or caraway seeds as traditional options, or experiment with other mix-ins like chopped nuts, dried cranberries, or herbs to put your own spin on this classic Irish Soda Bread Recipe Nostalgic Ultimate Classic Recipe.
Final Thoughts
Baking this Irish Soda Bread Recipe Nostalgic Ultimate Classic Recipe is more than just making bread—it’s a way to connect with tradition and enjoy the simple pleasures of homemade comfort food. Once you try it, you’ll want to keep this recipe close at hand for every cozy breakfast, afternoon tea, or dinner side. Trust me, it’s a timeless classic that never goes out of style.
Print
Irish Soda Bread Recipe Nostalgic Ultimate Classic Recipe
- Prep Time: 10 minutes
- Cook Time: 40 minutes
- Total Time: 50 minutes
- Yield: 1 loaf (8 servings)
- Category: Bread
- Method: Baking
- Cuisine: Irish
Description
This classic Irish Soda Bread recipe offers a nostalgic, rustic loaf with a tender crumb and crisp crust. Made with simple pantry staples like all-purpose flour, baking soda, and buttermilk, it’s a quick bread that delivers authentic Irish flavor with minimal effort. Perfect as a hearty accompaniment to soups or stews, or simply enjoyed with butter and jam.
Ingredients
Dry Ingredients
- 4 cups (500 g) all-purpose flour, plus extra for shaping
- 1 tsp baking soda (fresh for best rise)
- 1 tsp fine salt
- 1–2 tbsp (12–25 g) sugar or honey (optional, for slight sweetness)
- 1 tbsp caraway seeds (optional, for traditional flavor)
- ¾ cup (110–120 g) raisins or currants (optional, for sweet, bakery-style bread)
Wet Ingredients
- 1 ¾ cups (420 ml) cold buttermilk, plus 1–2 tbsp as needed
- 2 tbsp (28 g) cold unsalted butter, cut into small pieces (optional, for richer crumb)
Instructions
- Preheat Oven and Prepare Pan: Preheat your oven to 425°F (220°C). Line a baking sheet with parchment paper or place a cast-iron skillet in the oven to heat; either option works well to develop a rustic crust.
- Mix Dry Ingredients: In a large bowl, whisk together the flour, baking soda, salt, and sugar or honey if using. If using butter, rub it in with your fingertips until the mixture resembles coarse crumbs. This ensures even distribution of the leavening agents and adds richness.
- Add Buttermilk and Form Dough: Make a well in the center of the flour mixture and pour in the cold buttermilk. Stir gently with a fork or wooden spoon until a shaggy dough forms. If the dough is too dry with visible dry patches, add buttermilk one tablespoon at a time until just combined. Do not overmix; a light hand will keep the bread tender.
- Fold in Add-ins and Shape Dough: Turn the dough onto a lightly floured surface. If using raisins, currants, or caraway seeds, fold them in with just two to three gentle turns to avoid overworking. Pat the dough into a round approximately 6–7 inches (15–18 cm) wide and 1½–2 inches (4–5 cm) thick.
- Score the Loaf: Transfer the dough round to the heated skillet or prepared baking sheet. Use a sharp knife to cut a deep cross about ½ inch (1 cm) deep across the top. This scoring allows the loaf to expand during baking and gives it its classic soda bread appearance.
- Bake: Bake at 425°F (220°C) for 25 minutes. Then reduce the oven temperature to 400°F (200°C) and bake for an additional 10–15 minutes until the bread is deeply golden and sounds hollow when tapped on the bottom.
- Cool Before Slicing: Remove the loaf from the oven and transfer it to a wire rack. Allow it to cool for at least 20–30 minutes before slicing. This resting period improves the crumb texture and makes slicing easier.
Notes
- Measure flour by spooning it lightly into the cup and leveling it, rather than scooping, to avoid dense bread.
- Use fresh baking soda for the best rise and texture.
- Buttermilk is essential for flavor and activating the baking soda; if dough is dry, add buttermilk incrementally.
- Minimum handling and gentle mixing ensure a tender crumb and rustic texture.
- Scoring the loaf deeply helps it bake evenly and creates its iconic look.
- Let the bread cool before slicing to prevent a gummy texture inside.


