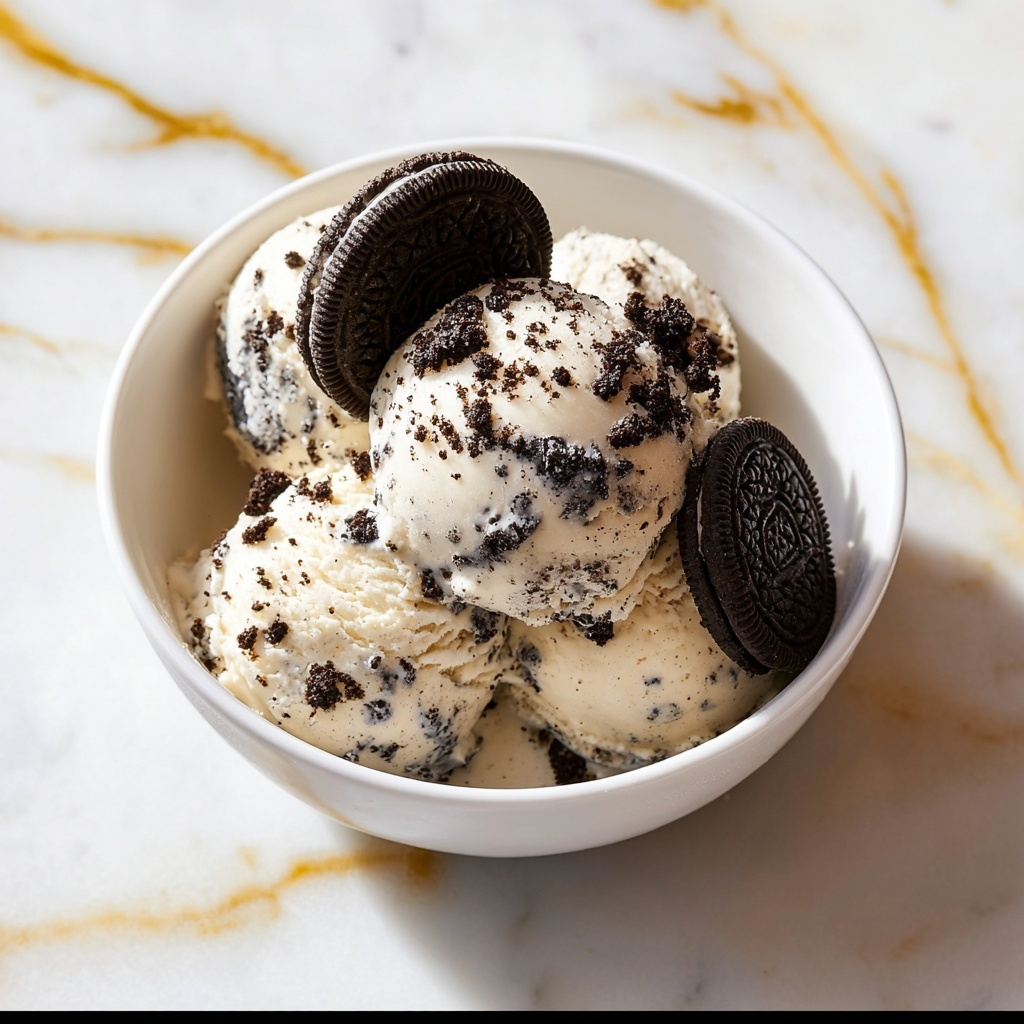
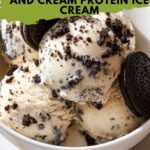
If you’re on the hunt for a deliciously creamy and guilt-free treat, this Ninja Creami Cookies and Cream Protein Ice Cream Recipe is exactly what you need. Imagine all the nostalgic flavors of classic cookies and cream ice cream, packed with a powerful protein punch and without any of the excess sugar or guilt. It’s smooth, indulgent, and incredibly easy to whip up, making it a perfect dessert or post-workout snack that feels like a sweet reward rather than a compromise.
Ingredients You’ll Need
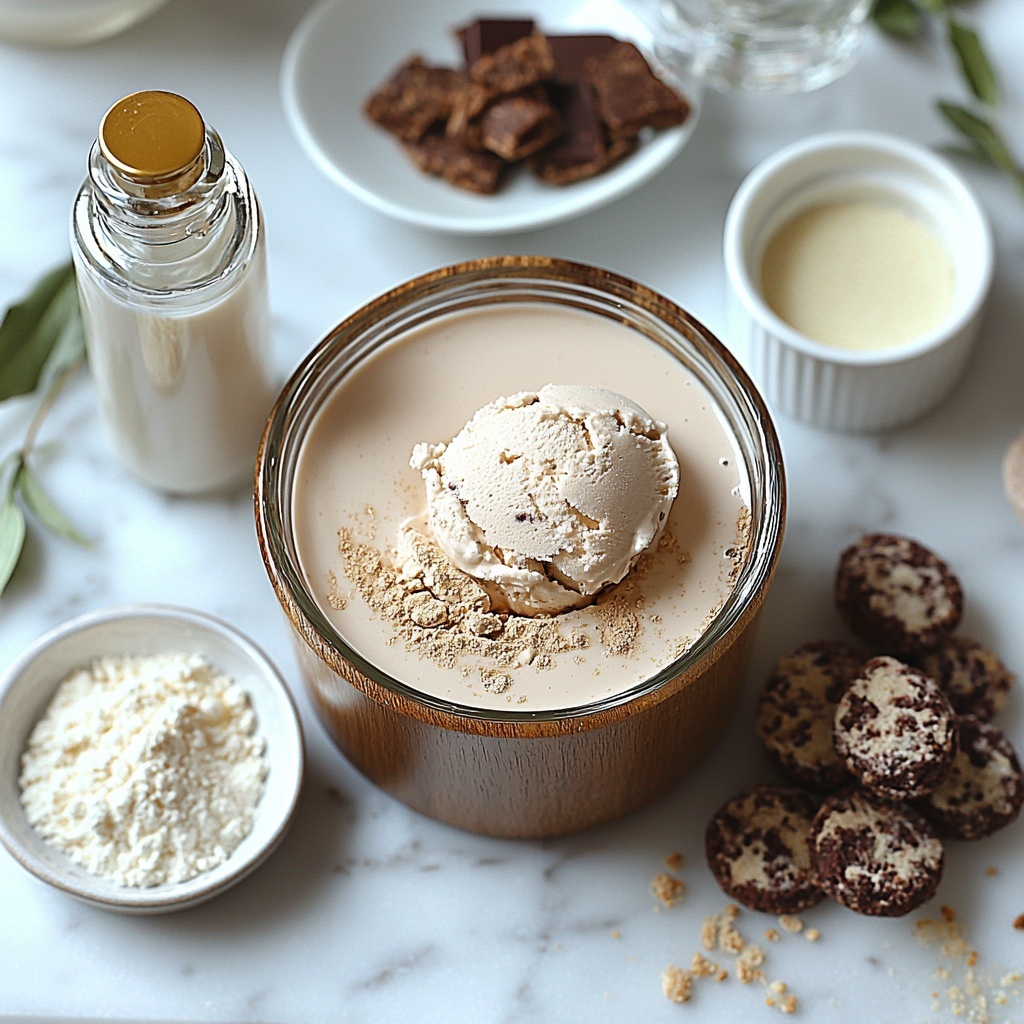
The magic of this recipe lies in its simplicity. Each ingredient plays a crucial role in building that luscious creamy texture and iconic cookies and cream flavor, all while keeping the protein content high and sugar low. You’ll find these essentials in most kitchens or health-conscious pantries, and together they create pure bliss in a pint.
- 1 cup unsweetened vanilla almond milk (or milk of choice): This forms the creamy liquid base that keeps it light and dairy-free if you prefer.
- 1 scoop vanilla or cookies and cream protein powder: The hero ingredient, providing that satisfying protein boost and subtle sweetness.
- 1 tablespoon instant sugar-free vanilla pudding mix (optional): Adds extra creaminess and body to mimic traditional ice cream texture perfectly.
- 1/2 teaspoon vanilla extract: Enhances the overall flavor, making every bite rich and aromatic.
- Sweetener to taste (e.g., 1–2 teaspoons allulose, monk fruit, or stevia): Keeps the dessert sweet without adding sugar or unnecessary carbs.
- 2–3 crushed protein cookies or sugar-free chocolate sandwich cookies: These give the famous “cookie” crunch and little bursts of chocolatey goodness in every scoop.
How to Make Ninja Creami Cookies and Cream Protein Ice Cream Recipe
Step 1: Blend the Base
Start by combining the unsweetened vanilla almond milk, protein powder, optional pudding mix, vanilla extract, and your chosen sweetener in a blender or shaker bottle. Blend or shake well until the mixture is completely smooth. This ensures your ice cream base is perfectly uniform, which will lead to that ideal creamy texture once frozen.
Step 2: Freeze the Mixture
Pour your smooth mixture into the Ninja Creami pint container, being careful not to go past the max fill line. Seal the container tightly and place it flat in your freezer. It needs at least 24 hours to freeze solid, so this step requires a bit of patience, but the payoff is totally worth it.
Step 3: Process in the Ninja Creami
Once your pint is frozen solid, install it into the Ninja Creami machine. Process using the “Lite Ice Cream” or “Protein” setting. This machine does all the heavy lifting, turning your frozen blend into creamy, velvety ice cream in minutes.
Step 4: Adjust Texture if Needed
After the initial spin, check the texture. If it’s crumbly or too icy, add 1–2 tablespoons of almond milk to soften it, then re-spin. This tip is a game changer for achieving a scoopable, luscious consistency every single time.
Step 5: Mix in the Cookies
Fold in your crushed cookies by hand or use the Ninja Creami’s “Mix-In” function to distribute them evenly throughout your ice cream. These little cookie bits add that irresistible crunch and flavor that make this protein ice cream truly special.
Step 6: Enjoy or Freeze for Later
You can serve the ice cream immediately if you prefer a soft-serve texture, or pop it back into the freezer for a firmer scoop that’s more like traditional ice cream. Either way, it’s ready to impress.
How to Serve Ninja Creami Cookies and Cream Protein Ice Cream Recipe
Garnishes
Think extra texture and flavor! Top your protein ice cream with crushed sugar-free cookies, a light drizzle of sugar-free chocolate syrup, or a sprinkle of cacao nibs. These simple garnishes elevate the presentation and add a new dimension to each spoonful.
Side Dishes
Pair your ice cream with fresh berries or a few slices of banana to complement the creamy richness with natural sweetness and bright flavors. For a heartier option, serve alongside a warm almond butter toast to get a fantastic contrast of temperatures and textures.
Creative Ways to Present
For a fun twist, serve your Ninja Creami Cookies and Cream Protein Ice Cream Recipe in waffle cones, low-carb bowls, or even inside hollowed-out mini chocolate protein muffins. You can also layer it with crushed cookies and fresh fruit in a parfait glass for an irresistible visual treat.
Make Ahead and Storage
Storing Leftovers
Any leftover protein ice cream should be stored in the original pint container with a tight seal to prevent ice crystals from forming. Keep it in the freezer and consume within 2 weeks for the best texture and flavor.
Freezing
This recipe benefits from freezing before and after processing. If you want to make it ahead of time, the base can be frozen in the pint container for up to a month before processing. After mixing, refreeze for at least 2 hours if you prefer a firmer scoopable texture again.
Reheating
While ice cream isn’t usually reheated, if your Ninja Creami Cookies and Cream Protein Ice Cream Recipe becomes too hard, simply let it sit at room temperature for a few minutes. This softens it enough to scoop easily without losing its creamy consistency.
FAQs
Can I use dairy milk instead of almond milk?
Absolutely! You can substitute with any milk you like, including dairy options like whole or skim milk. Just keep in mind that the fat content will influence how creamy your ice cream turns out.
What protein powder works best for this recipe?
A smooth, high-quality vanilla or cookies and cream flavored protein powder works best. Avoid powders with gritty textures as they can affect the ice cream’s creaminess.
Can I make this recipe without the pudding mix?
Yes! The pudding mix is optional but adds a lovely creamy texture. If you omit it, your ice cream might be slightly less rich but still delicious and satisfying.
How many servings does this recipe yield?
This recipe makes 1 pint in total, which usually serves about 2 people, each getting a generous half-pint portion packed with protein.
Can I add other mix-ins besides cookies?
Definitely! Feel free to get creative with sugar-free chocolate chips, chopped nuts, or swirls of peanut butter for a customized treat that suits your taste buds perfectly.
Final Thoughts
If you’ve been looking for a decadent yet healthy dessert, this Ninja Creami Cookies and Cream Protein Ice Cream Recipe is your new best friend. It’s quick to prepare, customizable, and endlessly satisfying. Once you try it, you might just find yourself grabbing a spoon a little more often — and that’s a sweet habit you can feel good about!
Print
Ninja Creami Cookies and Cream Protein Ice Cream Recipe
- Prep Time: 5 minutes (plus 24 hours freezing)
- Cook Time: 0 minutes
- Total Time: 24 hours 5 minutes
- Yield: 1 pint (2 servings)
- Category: Dessert
- Method: Freezing
- Cuisine: American
- Diet: Low Sugar
Description
Indulge in a healthy twist on a classic favorite with this Ninja Creami Cookies and Cream Protein Ice Cream. Made with creamy almond milk, protein powder, and crushed protein cookies, this dessert is perfect for those seeking a high-protein, low-sugar treat. The ice cream is easy to prepare using the Ninja Creami machine, delivering a smooth, creamy texture that’s customizable and guilt-free.
Ingredients
Base Ingredients
- 1 cup unsweetened vanilla almond milk (or milk of choice)
- 1 scoop vanilla or cookies and cream protein powder
- 1 tablespoon instant sugar-free vanilla pudding mix (optional, for creaminess)
- 1/2 teaspoon vanilla extract
- Sweetener to taste (e.g., 1–2 teaspoons allulose, monk fruit, or stevia)
Mix-Ins
- 2–3 crushed protein cookies or sugar-free chocolate sandwich cookies
Instructions
- Combine Ingredients: In a blender or shaker bottle, combine the almond milk, protein powder, pudding mix (if using), vanilla extract, and your choice of sweetener. Blend or shake thoroughly until the mixture is completely smooth and well incorporated.
- Freeze Mixture: Pour the blended mixture into a Ninja Creami pint container, being careful not to exceed the max fill line. Seal the container tightly and freeze flat for at least 24 hours to ensure the mixture solidifies properly.
- Process in Ninja Creami: Once the mixture is fully frozen solid, install the pint into the Ninja Creami machine. Select and run the “Lite Ice Cream” or “Protein” setting to process the base into a creamy ice cream texture.
- Adjust Texture if Needed: After the initial spin, check the consistency. If the ice cream appears crumbly, add 1–2 tablespoons of almond milk to the pint and re-spin to achieve a smoother texture.
- Add Cookies: Gently fold in the crushed protein or sugar-free chocolate sandwich cookies by hand, or use the Ninja Creami’s “Mix-In” function to evenly distribute the cookie pieces throughout the ice cream.
- Serve or Store: Serve immediately for a soft-serve style treat or refreeze for a firmer, scoopable ice cream consistency. Enjoy your protein-packed dessert!
Notes
- Customize your ice cream with additional mix-ins such as chocolate chips or peanut butter swirls.
- Use a high-quality, smooth protein powder to achieve the best creamy texture.
- Adjust sweetness and mix-ins according to taste preferences.
- Ensure the mixture is frozen flat and completely solid before processing for optimal results.


