Description
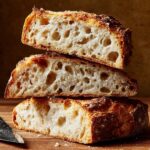
This No Knead Bread recipe is a simple, hands-off approach to homemade artisan bread, requiring minimal effort with maximum flavor. Combining just a few basic ingredients, this recipe uses a long overnight fermentation to develop a deliciously crusty loaf with a soft, airy crumb. Perfect for beginners, it requires no kneading and uses a Dutch oven to achieve the ideal crust.
Ingredients
Scale
Dry Ingredients
- 3 1/4 cups (425 grams) all-purpose flour
- 2 teaspoons fine sea salt
- 1/2 teaspoon active dry yeast
Wet Ingredients
- 1 1/2 cups warm water (about 110°F)
Instructions
- Mix Ingredients: In a large mixing bowl, stir together the flour, salt, and yeast until well combined. Add the warm water and mix with a wooden spoon or spatula until the dough is evenly incorporated and no large flour streaks remain. The dough will be loose and shaggy, which is expected.
- First Rise: Cover the bowl tightly with plastic wrap or beeswrap, then let the dough rest at room temperature for 12 to 18 hours to ferment and develop flavor.
- Shape the Dough: Transfer the dough onto a well-floured surface. Fold the dough by pulling the outer edges toward the center multiple times until it feels tighter and holds shape, forming a round dough ball. Sprinkle extra flour if sticky. Lightly flour the top and flip it upside down onto parchment paper so the smooth side is up. Shape into an even circle, then loosely cover with plastic wrap and let rest while the oven heats.
- Preheat Oven and Dutch Oven: Place an empty Dutch oven inside your oven and preheat both to 450°F. Heat for 20-30 minutes to ensure the Dutch oven is very hot. Continue to let the dough rest during this time. If the dough spreads, reshape it into a tighter ball prior to baking.
- Bake the Bread: Carefully remove the hot Dutch oven using oven mitts. Lift the parchment paper with the dough and transfer it into the Dutch oven. Cover with the lid and bake for 30 minutes. Then remove the lid and bake for an additional 10-20 minutes until the crust is deeply golden and crispy to your liking.
- Cool and Serve: Remove the bread from the oven, and gently lift it out using the parchment paper to transfer it to a wire cooling rack. Allow the bread to cool completely for at least 30 minutes before slicing. Serve and enjoy your fresh homemade bread!
Notes
- Make sure the water is warm but not hot (about 110°F) to properly activate the yeast without killing it.
- The long fermentation time is key for flavor development, so don’t rush this step.
- Use a Dutch oven with a tight-fitting lid to create steam and achieve a crispy crust.
- Extra flour can be added during shaping to prevent sticking, but avoid adding too much to keep the bread light.
- Letting the bread cool fully before slicing avoids a gummy texture inside.