
Nothing captures the essence of warm, sunny days quite like the Strawberry Banana Pudding Dream: A No-Bake Summer Delight Recipe. This luscious treat layers creamy sweetness, fresh fruit, and crisp wafers in a harmony of texture and flavor that feels like a celebration with every spoonful. It’s perfect for those moments when you crave something refreshing and indulgent without turning on your oven, making it a true summer star. Whether for a casual family gathering or an elegant picnic, this recipe delivers pure joy with every bite.
Ingredients You’ll Need
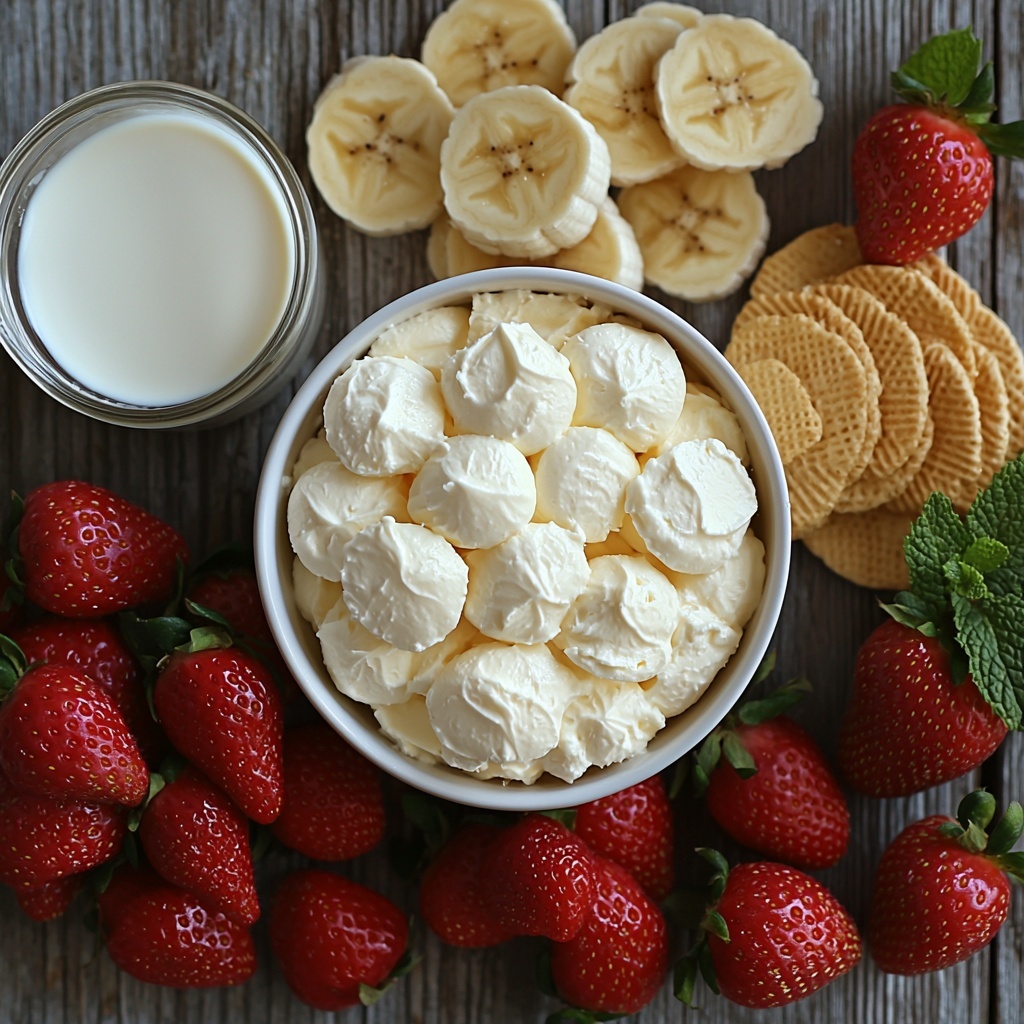
Gathering simple yet high-quality ingredients is the first step toward creating this delightful no-bake dessert. Each component plays a special role—from the creamy tang of the cream cheese to the natural sweetness of fresh strawberries and bananas—combining to give this pudding its signature rich and refreshing flavor.
- 8 oz Cream Cheese (softened): Adds a smooth, velvety texture and a slight tang that balances the sweetness.
- 14 oz Sweetened Condensed Milk: Infuses the pudding with creamy sweetness, reducing the need for extra sugar.
- 3.4 oz French Vanilla Pudding Mix: Thickens the mixture and gives a luscious vanilla flavor.
- 2 cups Milk (any kind): Combines with the pudding mix to create the perfect creamy base.
- 1 box Vanilla Wafers: Adds a pleasant crunch and classic flavor; gluten-free wafers work great for a GF version.
- 3 medium Bananas (sliced): Brings natural sweetness and a soft creaminess that pairs wonderfully with the strawberries.
- 1 lb Strawberries (sliced): Offers a bright, juicy freshness and beautiful color contrast.
- 8 oz Whipped Topping (optional homemade): Creates a light, airy finish that makes each bite feel extra luxurious.
How to Make Strawberry Banana Pudding Dream: A No-Bake Summer Delight Recipe
Step 1: Prepare the Creamy Base
Start by beating the softened cream cheese until perfectly smooth. Slowly add the sweetened condensed milk for sweetness and silkiness, then whisk in the French vanilla pudding mix and milk. Combine everything well until the mixture becomes thick and velvety. This creamy base will be the heart of your pudding, enveloping every flavor that comes next.
Step 2: Layer the Vanilla Wafers
Grab your serving dish—whether a trifle bowl or individual parfait glasses—and lay down a generous layer of vanilla wafers. These provide the essential crunch and classic flavor that make this dessert a nostalgic favorite. The wafers will slowly soak up some creaminess, becoming irresistibly soft yet still texturally satisfying.
Step 3: Add Fresh Strawberries and Bananas
Next, scatter sliced bananas and strawberries over the wafers. Their natural sweetness and juicy freshness add brightness and balance to the rich pudding. Be generous here, as the fruit brings vibrant color and a refreshing twist to every bite.
Step 4: Spread the Creamy Pudding Mixture
Now, spoon a thick layer of your prepared creamy base over the fruit and wafers. Evenly distribute it so that the fruit is lovingly enveloped. This step locks in moisture and promises a smooth, dreamy texture that makes this dessert so unforgettable.
Step 5: Repeat the Layers
Continue layering wafers, fruit, and pudding cream until your dish is filled, finishing with a luscious top layer of pudding. This layered approach ensures that every serving has the perfect balance of crunchy, creamy, and fruity elements.
Step 6: Chill to Perfection
Cover your creation and refrigerate it for at least 2 to 4 hours or overnight. This chilling step allows the flavors to meld beautifully and the wafers to soften just enough for that perfect spoonful texture. Patience here rewards you with an utterly dreamy dessert experience.
Step 7: Optional Whipped Topping
Before serving, add a dollop or a spread of whipped topping for a cloud-like finish. It adds a light sweetness and makes the pudding feel like a special occasion treat. You can use store-bought or homemade whipped cream, depending on your preference.
How to Serve Strawberry Banana Pudding Dream: A No-Bake Summer Delight Recipe
Garnishes
To make your Strawberry Banana Pudding Dream: A No-Bake Summer Delight Recipe even more inviting, garnish with a few whole strawberries, banana slices, or a sprinkle of crushed vanilla wafers. Fresh mint leaves add a pop of green and a refreshing aroma that complements the fruity sweetness beautifully.
Side Dishes
This dessert shines best on its own but can be paired with light, citrusy salads or simple iced tea to create the perfect summery palette. If serving at a dinner party, a scoop of vanilla bean ice cream alongside adds a creamy chill that your guests will adore.
Creative Ways to Present
For an elegant twist, try serving this pudding in individual mason jars or clear parfait glasses so the beautiful layers show through. You can also turn it into mini parfaits by layering in small cups, making it perfect for picnics or casual get-togethers. Adding edible flowers offers a charming, whimsical touch that delights the eye before the taste buds.
Make Ahead and Storage
Storing Leftovers
After enjoying your Strawberry Banana Pudding Dream: A No-Bake Summer Delight Recipe, store any leftovers in an airtight container in the refrigerator. It will keep fresh for up to 3 days. The flavors deepen wonderfully, but the texture of the wafers is best soon after preparation for maximum crunch.
Freezing
While this dessert is best enjoyed fresh or chilled, you can freeze portions for up to a month. Keep in mind, the texture may change slightly upon thawing due to the fruit and wafers, so it’s ideal to consume within a week if frozen. Thaw overnight in the fridge for best results.
Reheating
Because this is a no-bake pudding served cold, reheating is not recommended. Serve it straight from the refrigerator for the best texture and flavor experience. If frozen, allow to thaw completely to enjoy the creamy dreaminess intended in the recipe.
FAQs
Can I use other fruits besides strawberries and bananas?
Absolutely! While strawberries and bananas are classic, you can experiment with blueberries, raspberries, or peaches to tailor this recipe to your taste or whatever is in season. Just keep in mind the texture and sweetness level to maintain balance.
Is it possible to make this recipe dairy-free?
Yes! Substitute the cream cheese and milk with dairy-free alternatives like coconut cream and almond milk. Use dairy-free pudding mix and whipped topping to keep it completely plant-based while preserving that creamy texture.
How long does it take to assemble this pudding?
The assembled time is quite quick—about 20 minutes. Much of the process involves layering and mixing, so it’s a great recipe when you want a fuss-free dessert that still impresses.
Can I prepare this dessert the day before a party?
Definitely! In fact, making it a day ahead allows the flavors to deepen and the wafers to soften perfectly. Just keep it covered and chilled until you’re ready to serve.
What if I prefer less sweetness?
If you’d like to dial down the sweetness, consider using a reduced-sugar or sugar-free pudding mix and whipped topping. You can also reduce the amount of sweetened condensed milk slightly or add a bit more cream cheese to increase the tanginess.
Final Thoughts
If you are searching for a dessert that captures the joyful spirit of summer without turning on your oven, the Strawberry Banana Pudding Dream: A No-Bake Summer Delight Recipe is your perfect answer. Its layers of fresh fruit, creamy pudding, and crunchy wafers come together to create a dish that’s as comforting as it is refreshing. I promise, once you try it, this pudding will become a beloved part of your seasonal repertoire.
Print
Strawberry Banana Pudding Dream: A No-Bake Summer Delight Recipe
- Prep Time: 20 minutes
- Cook Time: 0 minutes
- Total Time: 20 minutes prep + 4 hours chilling
- Yield: 8 servings
- Category: Dessert
- Method: No-Cook
- Cuisine: American
- Diet: Gluten Free
Description
Strawberry Banana Pudding Dream is a luscious no-bake dessert perfect for summer gatherings. This creamy, fruity pudding layers smooth vanilla pudding, sweet bananas, ripe strawberries, and crunchy vanilla wafers for a delightful texture and flavor combination. Easy to assemble and chilled to perfection, it’s an ideal refreshing treat that requires no oven time.
Ingredients
Pudding Mixture
- 8 oz Cream Cheese (softened)
- 14 oz Sweetened Condensed Milk
- 3.4 oz French Vanilla Pudding Mix
- 2 cups Milk (any kind)
Fruit Layer
- 3 medium Bananas (sliced)
- 1 lb Strawberries (sliced)
Other
- 1 box Vanilla Wafers (use gluten-free wafers for gluten-free version)
- 8 oz Whipped Topping (optional homemade or store-bought)
Instructions
- Prepare the Pudding Mixture: In a large mixing bowl, beat the softened cream cheese until smooth. Gradually add the sweetened condensed milk and mix until well combined. Then, whisk in the French vanilla pudding mix and milk. Continue whisking until the mixture thickens, approximately 2-3 minutes.
- Layer the Ingredients: In a large trifle dish or serving bowl, place a layer of vanilla wafers. Add a layer of sliced bananas and a layer of sliced strawberries on top of the wafers. Pour a portion of the pudding mixture over the fruit and wafers to cover evenly.
- Repeat Layers: Repeat the layering process—wafers, bananas, strawberries, and pudding—until all ingredients are used, finishing with a layer of pudding on top.
- Add Whipped Topping: Spread the whipped topping evenly over the final pudding layer to create a creamy finish. This step is optional but recommended for added richness.
- Chill the Pudding: Cover the assembled pudding with plastic wrap and refrigerate for at least 4 hours, or overnight, to allow the wafers to soften and flavors to meld.
- Serve: Once chilled, garnish with extra sliced strawberries or wafers if desired and serve cold.
Notes
- Use gluten-free vanilla wafers to make this recipe gluten-free.
- The pudding thickens quickly once mixed, so work efficiently during assembly.
- For a lighter option, substitute the cream cheese with mascarpone or reduce the whipped topping amount.
- Slice fruit just before assembling to prevent browning.
- Store covered in the refrigerator and consume within 2-3 days for best freshness.


