
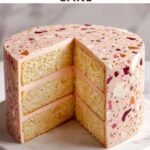
If you want to impress your loved one this season with something truly special and visually stunning, the Valentine’s Terrazzo Cake Recipe is your go-to treat. This cake combines a tender, moist vanilla base with a luscious cream cheese whipped filling and is adorned with vibrant terrazzo-style chocolate shards that give it an artistic and festive look. It’s not only beautiful but also layered with delicious flavors and textures that make every bite a celebration of passion and sweetness. Whether for Valentine’s Day or any romantic occasion, this cake will brighten your dessert table and hearts alike.
Ingredients You’ll Need
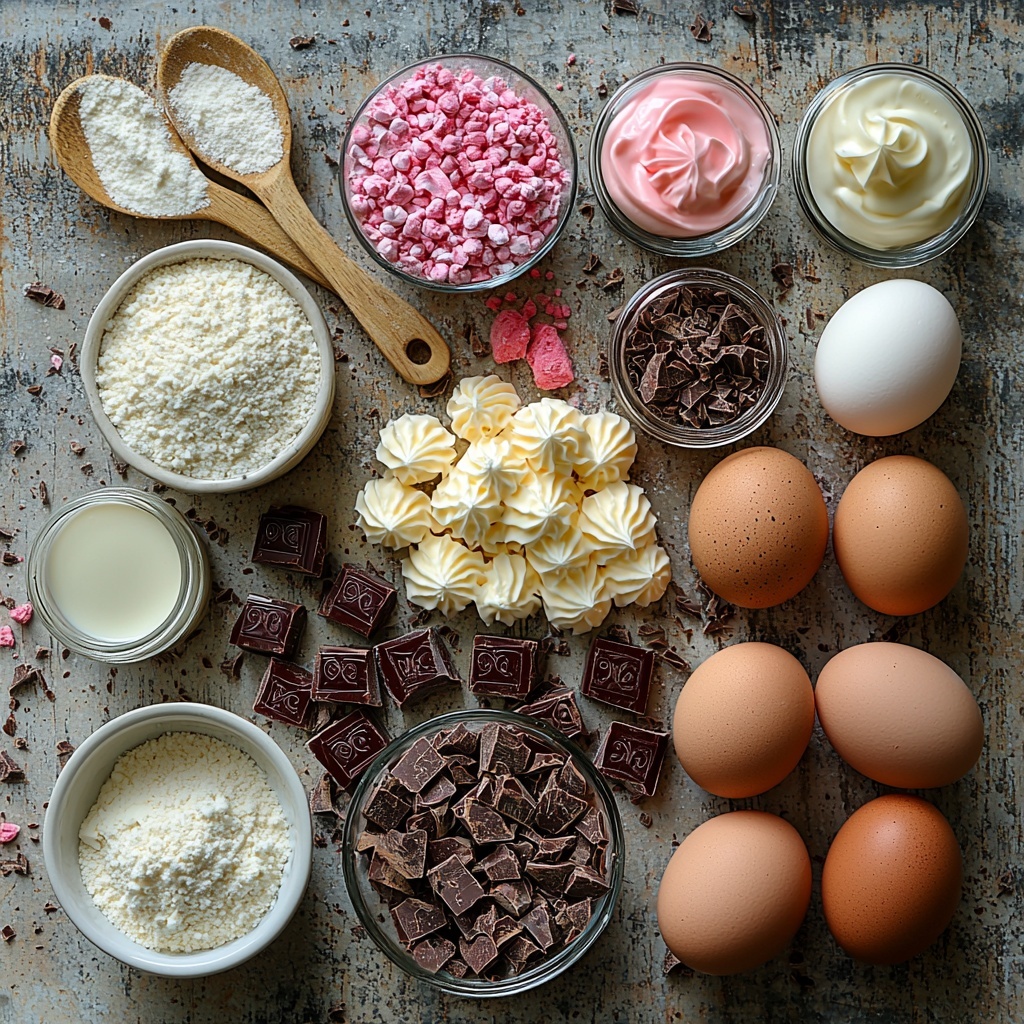
Believe it or not, this Valentine’s Terrazzo Cake Recipe relies on simple, everyday ingredients that come together to create a show-stopping dessert. Each item plays its part—flour for structure, butter and sugar for richness and sweetness, and colorful chocolate shards to add that signature artistic flair.
- All-purpose flour: Provides the perfect foundation for the cake’s tender crumb.
- Baking powder: Helps the cake layers rise beautifully without being dense.
- Unsalted butter: Adds richness and moisture to the cake and buttercream.
- Granulated sugar: Sweetens the cake just right for balanced flavor.
- Large eggs: Bind ingredients and give structure.
- Vanilla bean paste (or extract): Infuses the cake with warm, aromatic notes.
- Whole milk: Keeps the cake moist and tender.
- Cream cheese: Essential for the creamy and tangy whipped filling layer.
- Powdered sugar: Used in the filling and buttercream for smooth sweetness.
- Heavy whipping cream: Whips up light and fluffy for the filling and soft buttercream texture.
- White chocolate: Melted and tinted to create the terrazzo shards, adding an eye-catching design.
- Gel food coloring: Brings the terrazzo shards and buttercream to life with vibrant reds, pinks, and neutrals.
- Parchment paper: For assembling the chocolate shards without sticking.
How to Make Valentine’s Terrazzo Cake Recipe
Step 1: Bake the Cake Layers
Start by preheating your oven and preparing your cake pans properly with greasing and parchment lining—this guarantees a smooth release. Whisk the dry ingredients separately and then cream the butter and sugar into a fluffy base. Adding eggs one at a time ensures everything emulsifies nicely, while alternating dry ingredients and milk helps keep the batter even. Once your batter is evenly divided into pans, bake until a toothpick comes out clean and the layers spring back to gentle touch. Cooling them completely is key before the next steps.
Step 2: Whip Up the Cream Cheese Filling
The cream cheese whipped filling is what truly elevates this cake to dreamy status. Getting the cream cheese completely smooth before incorporating the powdered sugar and vanilla ensures no lumps spoil the texture. Gradually folding in cold heavy cream and beating until soft peaks form results in a light, fluffy filling that contrasts beautifully with the cake layers.
Step 3: Craft the Terracotta Chocolate Shards
This step is pure artistry. By dividing melted white chocolate and tinting each portion with different rich colors, you create unique fragments that resemble terrazzo tiles—classic, colorful, and erratic in shape. Spreading these onto parchment paper and letting them set forms delicate shards to garnish your cake. Patience here pays off since the shards bring a punch of color and textural interest.
Step 4: Prepare the Pink Buttercream
Next, the buttercream comes in as the cake’s soft and sweet finishing touch. Creaming butter until pale before gradually adding powdered sugar helps achieve that perfect fluffy consistency. A splash of vanilla and just enough cream or milk gives this frosting a spreadable texture. Tinting it with a gentle pink hue keeps with the romantic Valentine’s theme without being overpowering.
Step 5: Assemble the Cake
Once your layers are cooled and ready, leveling them ensures a stable structure and professional look. Begin layering by spreading or piping your cream cheese filling between cake layers, optionally embedding a few terrazzo shards inside for added surprise and texture. After stacking all three layers, smooth a thin crumb coat of pink buttercream around the cake and chill it briefly to firm up. Then, flick on the final coating of buttercream to create that flawless velvety finish.
Step 6: Decorate in True Valentine’s Terrazzo Cake Recipe Style
The finale is where this recipe earns its name. Gently pressing the colored chocolate shards onto the sides and top of your cake mimics the look of classic terrazzo flooring, turning cake decorating into a fun, creative activity. The random yet balanced placement of shards in multiple shades delivers a visually stunning mosaic effect that is sure to amaze your guests before even tasting the first slice.
How to Serve Valentine’s Terrazzo Cake Recipe
Garnishes
Keep garnishes simple yet elegant to complement the cake’s design. Fresh raspberries, edible rose petals, or a sprinkle of fine sea salt can amplify the flavor and add a touch of sophistication. Just be mindful not to overshadow the colorful chocolate shards that are the star.
Side Dishes
A lightly brewed cup of Earl Grey tea or a chilled glass of sparkling rosé pairs beautifully with the cake’s sweet richness. For a refreshing twist, consider serving alongside a fresh berry compote to cut through the creaminess and balance the sweetness.
Creative Ways to Present
Present the cake on a sleek white or marble cake stand to emphasize the terrazzo shard colors. You can scatter a few extra shards artfully around the base or place matching macarons nearby in complementary shades. Adding twinkling fairy lights around the serving area will bring out the Valentine’s Day atmosphere perfectly.
Make Ahead and Storage
Storing Leftovers
This cake keeps well when stored in an airtight container in the refrigerator for up to 3 days. The cream cheese filling benefits from chilling, which helps maintain its texture and prevents it from becoming too soft. Before serving leftovers, letting it sit at room temperature for 10–15 minutes helps regain some softness.
Freezing
You can freeze individual cake layers before assembly for up to one month by wrapping them tightly in plastic wrap and foil. For the fully assembled cake, it’s best to freeze without the chocolate shards decoration to avoid damage. Defrost slowly in the refrigerator overnight and add shard decorations just before serving for the best presentation.
Reheating
Since this is a delicate, creamy cake, reheating isn’t recommended. Instead, enjoy the cake chilled or at room temperature. If desired, simply allow refrigerated slices to warm slightly at room temperature to enhance flavor and texture before eating.
FAQs
Can I use regular vanilla extract instead of vanilla bean paste for this Valentine’s Terrazzo Cake Recipe?
Absolutely! While vanilla bean paste adds a lovely speckled look and more intense vanilla flavor, good-quality vanilla extract works perfectly fine and will still give the cake a wonderful aroma.
What if I don’t have gel food coloring for the terrazzo shards?
You can substitute with powdered food coloring or liquid food coloring, but gel is preferred for its vibrant color without altering the chocolate’s consistency. Just add the color sparingly and mix well.
Is cream cheese filling suitable for people sensitive to dairy?
This filling contains cream cheese and heavy cream, so it is not dairy-free. For dietary restrictions, consider a dairy-free frosting alternative, but it may change the texture and flavor of the original Valentine’s Terrazzo Cake Recipe.
Can I make the cake layers ahead of time?
Definitely! Cake layers can be baked a day or two in advance and stored wrapped tightly in plastic wrap at room temperature or chilled in the fridge. This helps you save time on the day you assemble and decorate.
How do I prevent the terrazzo shards from melting when decorating?
Working in a cool room and chilling the shards before applying helps a lot. Also, press them gently into the chilled buttercream to avoid melting the chocolate and to keep them intact for the perfect terrazzo look.
Final Thoughts
There is something truly magical about creating a cake that is as breathtaking to look at as it is delicious to eat, and this Valentine’s Terrazzo Cake Recipe delivers exactly that. With its beautiful colors, divine flavor layers, and that charming terrazzo decoration, it’s sure to be a standout on any romantic occasion. I can’t wait for you to try it out and experience the joy it brings—happy baking and even happier sharing!
Print
Valentine’s Terrazzo Cake Recipe
- Prep Time: 1h 30m
- Cook Time: 28m
- Total Time: 1h 58m
- Yield: 12 servings
- Category: Dessert
- Method: Baking
- Cuisine: American
Description
This Valentine’s Terrazzo Cake is a stunning layered vanilla cake adorned with terrazzo-style colored chocolate shards and swathed in luscious pink buttercream. Featuring moist vanilla layers, a creamy whipped cream cheese filling, and playful multi-colored chocolate decorations, this cake combines visually striking artistry with delightful flavors—perfect for a romantic celebration or special occasion.
Ingredients
For the Vanilla Cake
- 2 ½ cups (315g) all-purpose flour
- 2 ½ tsp baking powder
- ½ tsp salt
- ¾ cup (170g) unsalted butter, softened
- 1 ¾ cups (350g) granulated sugar
- 4 large eggs, room temperature
- 1 tbsp vanilla bean paste (or vanilla extract)
- 1 cup (240ml) whole milk, room temperature
For the Cream Cheese Whipped Filling
- 8 oz (225g) cream cheese, softened
- ½ cup (60g) powdered sugar
- 1 tsp vanilla extract
- 1 ½ cups (360ml) heavy whipping cream, cold
For the Terrazzo Chocolate Shards
- 1 cup white chocolate, melted
- Gel food coloring in red, pink, burgundy, and ivory
- Parchment paper
For the Pink Buttercream
- 1 ½ cups (340g) unsalted butter, softened
- 5 cups (600g) powdered sugar
- 2–4 tbsp heavy cream or milk
- 1 tsp vanilla extract
- Gel food coloring in light pink
Instructions
- Make the Cake Layers: Preheat the oven to 350°F (175°C). Grease and line three 8-inch round cake pans with parchment paper. In a medium bowl, whisk together flour, baking powder, and salt. In a large bowl, beat softened butter and granulated sugar until light and fluffy, about 3–4 minutes. Add eggs one at a time, beating after each addition, then mix in vanilla bean paste. Alternately add the dry ingredients in three parts along with milk, starting and ending with flour. Mix gently until just combined. Divide batter evenly among pans and bake for 25–28 minutes or until a toothpick comes out clean. Cool in pans for 10 minutes, then move to wire racks to cool completely.
- Prepare the Cream Cheese Whipped Filling: In a medium bowl, beat cream cheese until smooth. Add powdered sugar and vanilla extract, mixing until fully combined. Slowly add cold heavy cream while beating on high speed until soft peaks form. Refrigerate until needed.
- Make the Terrazzo Chocolate Shards: Divide melted white chocolate into separate bowls and tint each with a different gel food coloring (red, pink, burgundy, ivory). On parchment paper, spoon small, irregular blobs of each color. Let set at room temperature or refrigerate until hardened. Once set, gently peel shards from parchment and set aside.
- Make the Pink Buttercream: Beat softened butter in a large bowl until smooth and pale. Gradually add powdered sugar, one cup at a time, beating well after each addition. Add vanilla extract and 2 tablespoons of cream or milk; beat for 2–3 minutes until fluffy. Adjust consistency with more cream if needed. Tint with light pink gel food coloring and mix thoroughly.
- Assemble the Cake: Level cooled cake layers if needed. Place the first layer on a cake board or serving plate. Spread or pipe an even layer of cream cheese whipped filling on top. Optionally press some terrazzo chocolate shards into the filling to add texture and color inside the cake. Repeat with remaining layers. Coat entire cake with a thin crumb coat of pink buttercream and chill for 15 minutes. Apply a smooth final layer of pink buttercream on the chilled cake.
- Decorate Terrazzo Style: Press colored chocolate shards gently into the sides and top of the cake in a random pattern, imitating terrazzo tile design. Alternate colors and shapes for balance. Chill the decorated cake briefly to set the decorations before serving.
Notes
- Ensure all ingredients for the cake and filling are at room temperature for best results.
- Use gel food coloring to avoid thinning the chocolate and buttercream consistency.
- Chilling the cake between crumb coat and final coat helps achieve a smooth finish.
- The chocolate shards can be made several days ahead and stored in an airtight container.
- For clean layers, use a serrated knife or cake leveler to trim domed tops off cake layers before assembling.
- If you prefer, substitute vanilla bean paste with high-quality vanilla extract.


